
Microsoft Cluster Server (MSCS) on Windows
Microsoft Windows 2003/2008 offers clusteringClustering allows your organisation to ensure your services are not affected if anything should happen to your main server. PaperCut is a cluster compatible application and is supported under Windows (Microsoft Cluster Server / MSCS, Microsoft Failover Cluster Manager / MSFCM, Vetitas Cluster Server / VCS) and Linux (Novell Cluster Services / NCS, Linux-HA) at all levels of the application, including: clustering at the print spooler service layer by integrating with clustering services, failover based clustering at the Application Server layer using clustering services, and at the database layer by utilising cluster aware databases such as Microsoft SQL Server, PostgreSQL, or Oracle. capabilities through its Microsoft Cluster Server (MSCS)Microsoft Cluster Service (MSCS) is a service that provides high availability for applications such as databases, messaging and file and print services. MSCS attempts to minimize the effect of failure on the system as any node (a server in the cluster) fails or is taken offline.
This section discusses both Clustering and high availability and Clustering and high availability configuration in Microsoft Cluster Server. For sites using Microsoft Failover Cluster Manager (MSFCM) on Windows 2008 R2, Veritas Cluster Server (VCS) on Windows or Novell Cluster Services (NCS) on Novell OES Linux, see the following sections.
This section assumes that you have an already installed and working clustered printing environment.
Mode 1 - Clustering at the Print Provider layer
The PaperCut Print ProviderA Print Provider is a monitoring service installed on a secondary print server to allow PaperCut to control and track printers. This monitoring component intercepts the local printing and reports the use back to the primary Application Server. is the component that integrates with the print spooler service and provides information about the print events to the PaperCut Application ServerAn Application Server is the primary server program responsible for providing the PaperCut user interface, storing data, and providing services to users. PaperCut uses the Application Server to manage user and account information, manage printers, calculate print costs, provide a web browser interface to administrators and end users, and much more.. At a minimum, in a cluster environment, the Print Provider component needs to be included and managed within the cluster group. The Application Server component (The Standard Install option in the installer) is set up on an external server outside the cluster. Each node in the cluster is configured to report back to the single Application Server using XML web servicesWeb services are a standardized way of integrating Web-based applications using the XML, SOAP, WSDL and UDDI open standards over an Internet protocol backbone. over TCP/IP.
Step 1 - Application Server (primary server) setup
Install the Application Server component (Standard Install option) on your nominated system. This system is responsible for providing PaperCut MF's web based interface and storing data. In most cases, this system will not host any printers and is dedicated to the roll of hosting the PaperCut Application Server. It can be one of the nodes in the cluster; however, a separate system outside the cluster is generally recommended. An existing domain controller, member server or file server will suffice.
Step 2 - Installing the Print Provider components on each node
The Print Provider component needs to be separately installed on each node involved in the print spooler cluster. This is done by selecting the Secondary Print Server option in the installer. Follow the secondary serverA PaperCut secondary server is a system that directly hosts a printer, that is, a print server with a Print Provider installed. A secondary server can be a server style system hosting many printers, a desktop style system hosting printer(s) also shared to other network users, or a desktop style system with the printer used only for local users (not shared). set up notes as detailed in Configuring secondary print servers and locally attached printers . Take care to define the correct name or IP address of the nominated Application Server set up in step 1.
Step 3 - Decouple service management from nodes
By default the Print Provider component is installed under the management of the node. To hand over management to the cluster, the service start-up type needs to be set to manual. On each node navigate to Control Panel > Administrative Tools > Services, locate the PaperCut Print Provider service. Stop the service and set the start-up type to Manual. Repeat for each node in the cluster.

Step 4 - Adding the Print Provider service as a resource under the print spooler's cluster group
-
Open the Cluster Administrator.
-
Right-click the cluster group hosting the spooler service; then select New > Resource.

-
In the new resource wizard, enter a name of PaperCut Print Provider, select a resource type of Generic Service; then click Next.
-
Click Next at Possible Owners.
-
Ensure that the Print Spooler Service resource is set as a required dependency, then click Next.
-
On the Generic Service Parameters page, enter a service name of PCPrintProvider and ensure the Use Network Name for computer name check box is selected. Click Next.

-
Click Finish at the Registry Replication page.


Step 5 - Shared active job spool
To ensure the state of jobs currently active (e.g. held in a hold/release queue) are not lost during a failover event, PaperCut MF is able to save job state in a shared drive/directory. If a shared disk resource is available and can be added to the cluster resource, PaperCut can use this to host a shared spool directory to ensure no active job state is lost.
Add a shared drive to the cluster resource. e.g. (Q: drive). It is advisable to use the same drive as used for the shared print spool directory.
Create a directory in this drive called PaperCut\\Spool .
On each node, edit the file: [app-path]/providers/print/win/print-provider.conf and add a line pointing to the shared active job spool directory:
SpoolDir=Q:\\PaperCut\\Spool
Change the drive letter as appropriate.Important:If running an "Active-Active" print cluster you must use a separate active job spool directory for each node. To configure this use the %service-name% value in the SpoolDir setting. The %service-name% value is replaced by the service name of the running PaperCut Print Provider instance. e.g.
SpoolDir=Q:\\PaperCut\\Spool\\%service-name%
See below for details on "Active-Active"
Step 6 - Bring up all cluster resources and test
Perform operations to verify that:
Print jobs log as expected.
There is no error message in the Print Providers text log located at: C:\Program Files\PaperCut MF\providers\print\win\print-provider.log on each node.
Active/Active clustering - multiple virtual servers
On large networks it is common to distribute load by hosting print spooler services under two or more virtual servers. For example, two virtual servers can each host half of the organization's printers and share the load. This is sometimes referred to as Active/Active clustering - albeit not an entirely correct term, as the print spooler is still running in Active/Passive.
Virtual servers cannot share the same service on any given node. For this reason if the virtual servers share nodes, manually install the PaperCut Print Provider service a second time under a different name. This can be done with the following command line:
cd \Program Files\PaperCut MF\providers\print\win
pc-print.exe PCPrintProvider2 /install
The argument preceding /install is the unique name to assign to the service. The recommended procedure is to suffix the standard service name with a sequential number. Repeat this on each physical node. Use a unique service name for each "active" virtual server hosted in the cluster group.Make sure that you have unique SpoolDir settings for each node of your cluster. Ensure that the SpoolDir setting in the print-provider.conf file has a %service-name% expansion variable as explained above. This ensures that each service has it's own spool directory.
Mode 2 - Clustering at all application layers
Mode 2 implements failover clustering at all of PaperCut MF's Service Oriented Architecture software layers, including:
Clustering at the Print monitoring layer
Clustering at the Application Server layer
Optional clustering at the database layer
Mode 2 builds upon Mode 1 by introducing failover (Active/Passive) clustering in the Application Server layer. This involves having an instance of the Application Server on each of the cluster nodes. When one node fails, the other automatically takes over the operation. Both instances use a shared data source in the form of an external database (see Deployment on an external database (RDBMS)). Large sites should consider using a clustered database such as Microsoft SQLStructured Query Language (SQL) is a special-purpose programming language designed for managing data held in a relational database management system (RDBMS), or for stream processing in a relational data stream management system (RDSMS). Server.
This section assumes that you have an already installed and working clustered printing environment.
Step 1 - Application Server installation
On one of the cluster's nodes, install the PaperCut Application Server component by selecting the Standard Install option in the installer. Follow the set up wizard and complete the process of importing all users into the system.
Step 2 - Convert the system over to an external database
The system needs to be configured to use an external database as this database is shared between both instances of the Application Server. Convert the system over to the required external database by following the procedure detailed in Deployment on an external database (RDBMS). The database can be hosted on another system, or inside a cluster. As per the external database setup notes, reference the database server by IP address by entering the appropriate connection string in the server.properties file.
Step 3 - Setup of 2nd node
Repeat steps 1 and 2 on the second cluster node.
Step 4 - Distribute application license
Install your license on each node in your cluster.
- In the Admin web interface, click the About tab.
- In the Register area, click Browse.
- Locate the license file.
- Click Install License.
- Verify that the license information is correctly listed in the About page.
Step 5 - Decouple service management from the nodes
By default the PaperCut Application Server component is installed under the management of the node. It needs to be managed inside the cluster, so set the service's start-up type to manual. On each node navigate to Control Panel > Administrative Tools > Services locate the PaperCut Application Server. Stop the service and set its start-up type to Manual. Repeat this on each node.
Step 6 - Create a new cluster group
Designate the PaperCut Application Server to run inside its own cluster group. Create a new cluster group containing the each of the nodes. Add an IP Resource and a Network Name resource. Give the network name resource an appropriate title such as PCAppSrv.
The need for a new cluster group is not required. It is, however, recommended as it gives the most flexibility in terms of load balancingPrinter load balancing automatically distributes print jobs between two or more printers. Load balancing is generally used to equally distribute print jobs across a pool of printers saving valuable time in document output for the user and at the same time balancing the wear and tear among printer devices. and minimizes the potential for conflicts.
Step 7 - Adding the PaperCut Application Service as a resource managed under the new cluster group.
-
Open the Cluster Administrator.
-
Right-click the cluster group hosting the spooler service; then select New > Resource.
-
In the new resource wizard, enter a name of PaperCut Application Server, select a resource type of Generic Service, then click Next.
-
Click Next at Possible Owners page.
-
Click Next at Dependency page.
-
On the Generic Service Parameters page, enter a service name of PCAppServer, ensure the Use Network Name for computer name option is checked; then click Next.
-
Click Finish at the Registry Replication page.
Step 8 - Bring the cluster group online
Right-click the cluster group; then select Bring online. Wait until the Application Server has started, then verify that you can access the system by pointing a web browser to :
http://[Virtual Server Name]:9191/admin
Log in, and perform some tasks such as basic user management and User/Group Synchronization to verify the system works as expected.Step 9 - Set up the Print Provider layer
Interface the PaperCut Print Provider layer with the clustered spooler service by following the same setup notes as described for Mode 1. The exception being that the IP address of the Application Server is the IP address assigned to the Virtual Server assigned in step 6.
Step 10 - Client configuration
[app-path]/client/
[app-path]/release/
[app-path]/client/win/config.properties
[app-path]/client/linux/config.properties
[app-path]/client/mac/PCClient.app/Contents/Resources/config.properties
[app-path]/release/connection.properties
Step 11 - Test
Mode 2 setup is about as complex as it gets! Take some time to verify all is working and that PaperCut MF is tracking printing on all printers and all virtual servers.
Advanced: Load distribution and independent groups
You can split the two application layers (Resources) into two separate Cluster Groups:
Group 1: Containing only the PaperCut Application Server service.
Group 2: Containing the PaperCut Print Provider and Print Spooler services. These services are dependent and must be hosted in the same group.
To make this change after setting up the single group Mode 2 configuration:
Change the ApplicationServer= option in [app-path]/providers/print/win/print-provider.conf on each physical node to the IP or DNS name of the virtual server.
Create a new group called PaperCut Application Server Group.
Set the Preferred owners of each group to different physical nodes.
Restart or bring on line each group, and independently test operation and operation after fail-over.
Clustering tips
-
Take some time to simulate node failure. Monitoring can stop for a few seconds while the passive server takes over the role. Simulating node failure is the best way to ensure both sides of the Active/Passive setup is configured correctly.
-
It is important that the version of PaperCut running on each node is identical. Ensure that any version updates are applied to all nodes so versions are kept in sync.
-
The PaperCut installation sets up a read-only share exposing client software to network users. If your organization is using the zero-install deployment method, the files in this share are accessed each time a user logs onto the network. Your network might benefit from exposing the contents of this share via a clustered file share resource.
-
PaperCut regularly saves transient state information (such as print job account selections) to disk so that this state can be recovered on server restart. If failing over to a new cluster server, you should ensure this state information is saved to a location available to the new server.
By default the state information is located in [app-path]/server/data/internal/state/systemstate. You can change this location if required by setting the property server.internal-state-path in your server.properties file.
Additional configuration to support Web Print
By default the Application Server looks in [app-path]\server\data\web-print-hot-folder for Web PrintWeb Print enables printing from user-owned devices without the need to install printer drivers and manage server authentication. files. This location is generally only available on one node in the cluster. To support Web Print in a cluster, add a Shared Folder on the Shared Storage in your cluster. This can be done on the same disk that the spool files reside and the Print Provider points to.
To change this location, use the Config EditorThe Config Editor stores information used by PaperCut to configure advanced options and functions. This information is stored in config keys, which are editable by an administrator. and modify the web-print.hot-folder key.
-
Add a Shared Folder on the Shared Storage, an example would be E:\web-print-hot-folder and share it as \\clustername\web-print-hot-folder\.
-
Click the Options tab.
The General page is displayed.
-
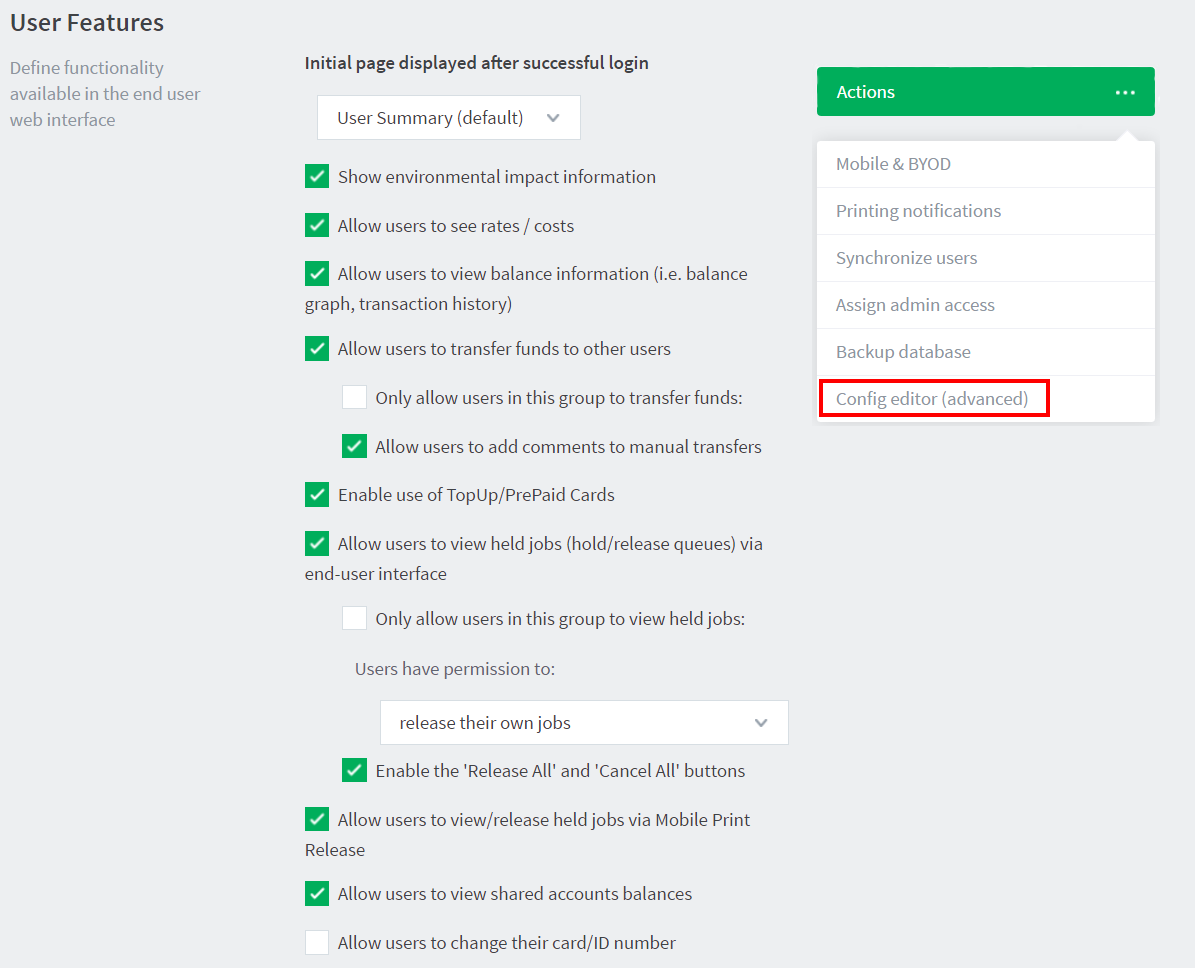
In the Actions menu, click Config editor (advanced).

The Config Editor page is displayed.
-
Modify web-print.hot-folder to E:\web-print-hot-folder
-
Map your selected network drive on the Web Print Sandbox machine to \\clustername\web-print-hot-folder\
-
Add all relevant printer queues from \\clustername to the Web Print Sandbox server.
Additional configuration to support Print Archiving
If you have enabled Print Archiving (viewing and content capture), the Applications Server stores archived print jobs in [app-path]\server\data\archive. This location is generally available only on one node in the cluster. To support Print Archiving in a cluster, add a Shared Folder on the Shared Storage in your cluster. This location must be accessible to all cluster nodes and also any print servers that are collecting print archives.
For instructions for moving the archive location see Phase 1: Moving the central archive:. This describes how to configure both the Application Server and your print servers to use the same shared storage location.