
Grant access to the account selection popup
By default all printing is automatically charged to the user's personal account. For a user to be able to select a shared accountA shared account is an account that is shared by multiple users. For example, in business, shared accounts can be used to track printing costs by business unit, project, or client. Organizations like legal firms, engineering firms, or accounting offices often have long lists of accounts, projects, clients, or matters. In a school or university, shared accounts can be used to track printing by departments, classes, or subjects. the user needs to be granted access to the account selection popup.

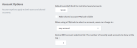
Access to the account selection popup, as shown in the above figure, is controlled at the user level on the user's details page.
Display the shared account selection popup all users
The Bulk user actions action is a convenient way to apply this change to many users.
-
Click the Groups tab.
The Group List page is displayed.
-
In the Actions menu, click Bulk user actions.
The Bulk User Operations page is displayed.
-
In the Change settings area, select the Change account selection setting check box; then select the account selection popup to display.

-
Complete the following optional fields:
- Information to show in popup—select the options you want available in the popup.
- Default shared account—enter the name of the shared account to which costs will be charged by default.
- When shared account is selected—select whether you want to charge costs to the shared account or the user's personal account.
-
Click OK.

Display the shared account selection popup per user
You can also apply the account selection popup to individual users.
-
Click the Users tab.
The User List page is displayed.
-
Select a user.
The User Details page is displayed.
-
In the Account Selection area, in Print account selection, select the account selection popup to display.

-
Complete the following optional fields:
- Information to show in popup—select the options you want available in the popup.
- Default shared account—enter the name of the shared account to which costs will be charged by default.
- When shared account is selected—select whether you want to charge costs to the shared account or the user's personal account.
-
Click OK.

You can also automatically charge printing to a single shared account without the need for the popup. This is useful in environments where a user only ever needs to charge to a single shared account so the popup is not needed.
Users must restart their workstation (or manually restart the PaperCut client software) for this change to take effect. Users with the Show the account selection popup option enabled must run the client software at all times. Print jobs do not print until the user has selected the account.
In addition to granting users access to the popup, they also need access to a shared account. You can control shared accounts access using two methods:
-
Network group membership
-
PINs (also known as security codes or passwords)
If an account is allocated a PIN (an alpha-numeric access code) users with knowledge of the PIN can select the account. A PIN based system would be a sensible selection in an organization when PINs are already in use for other systems such as photocopiers or door access codes.
PINs/codes can also be used when using parent and sub-accounts. To select a specific sub-account from the client software, both the parent and sub-account pins are required. Enter them in the format of: [parentPIN]-[subPIN] (i.e. they are separated by a hypen).
An alternate method is to delegate access to the shared account via network group membership. One advantage of group based control is that users do not have to remember PINs. Most medium to large organizations already have their network structured into suitable groups representing their position, title, department or work area. Use these existing groups to control access. Access to shared accounts can also be granted on an individual user basis, however, best practice suggests group-based management for medium to large networks.
In a Windows Active Directory environment, Organization Units are treated as special groups. This means you can also use them to control access to a shared account. Controlling access to shared accounts via group membership rather than individual user accounts is recommended. By using group based control, new users created on the network inherit the correct account access by virtue of their network group membership. This alleviates the need for additional user modification inside PaperCut MF.
To grant access to a shared account for all members in a given network group:
-
Click the Accounts tab.
The Shared Account List page is displayed.
-
Select an account.
The Account Details page is displayed.
-
Click Security.
-
Select the appropriate group from the list.
-
Click Add.


To simultaneously change security settings of multiple shared accounts, click the Bulk account actions link on the Accounts tab. For more information, see Bulk user operations.
Using account security with PIN/codes
PIN/codes provide a convenient way to select shared accounts. However, this convenience can compromise security when short or guessable PINs are used. For this reason PaperCut MF allows the user/group security to be also applied to PIN/code access. This allows sites to use convenient and short codes with confidence that only authorized users are granted access.
To enforce user/group security for PIN/code access:
-
Click the Options tab.
The General page is displayed.
-
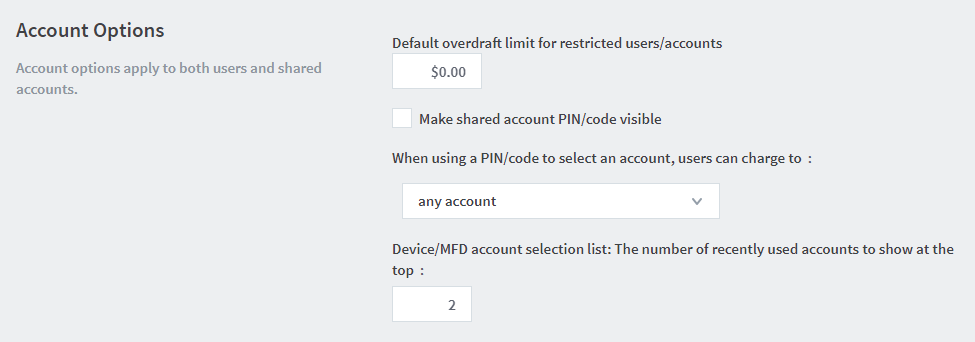
In the Account Options area, change When using a PIN/code to select an account, users can charge to to only those accounts they have access to.
-
Click Apply.
With this setting changed, users can select only an account using the PIN/code when they:
-
know the PIN/code; and
-
are in the shared account's user/group security