Table of Contents
PaperCut NG is a multi-user application designed to integrate with an authenticated network. The Macintosh system has a long history. It's grown up from a single-user desktop heritage and is now based on a full multi-user Unix kernel. However, some "single-user-isms" remain, and these can pose challenges for Administrators. One area in particular is remote printer configuration and credential management.

When a network printer, for example a shared Windows printer, is added to a Macintosh system, the Printer Setup Utility requests printer access credentials in the form of username and password. Any user that prints to this printer uses these supplied credentials. This means that on the print server, all jobs originating from this Mac system list with supplied username irrespective of who's actually using the Mac.
This chapter discussed some of the multi-user challenges and their solutions.
Macs can be set up to work with PaperCut NG in a number of configurations or scenarios. There is no "one best" set up. The ideal solutions will vary from network to network and will depend on factors like:
Your existing network configuration.
The mix and makeup of operating systems used on the network.
The underlying directory technologies (Active Directory, LDAP, etc.) if used.
Whether Macs are used by a single owner or multiple users.
The following sections outline common set up scenarios and their pros and cons. Your solution may fit one of these scenarios or may be composed of a combination.
Many networks, particularly those in a business environment, have a dedicated desktop system for each user. This allows the desktop system's global settings to be customized for the user. Common examples include:
Dedicated computers used in a business
Staff laptops or desktops used in education
Printers hosted and shared from a Windows or Linux server.
Mac systems used by a single user (or small group of known users).
Each user has a domain account and password.
The username associated with the account on the Mac matches the domain username (either the account used to login, or the account set up as the automatic log in account).
Running Mac OS X 10.3 or higher.
Check the user account information:
Start up the Mac and ensure the system is connected to the network.
From the Apple Menu select System Preferences...
Select Accounts
Click MyAccount.
Ensure that the Short name associated with the account matches the user's domain account username. If not, create a new working account as appropriate.
Set up the printers that the user requires access to:
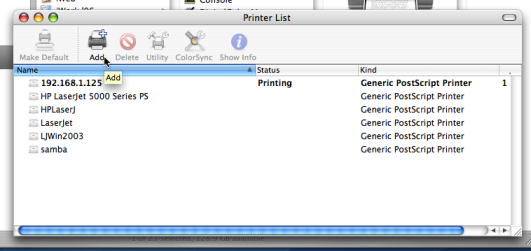
Open the Printer Setup Utility from Applications -> Utilities.
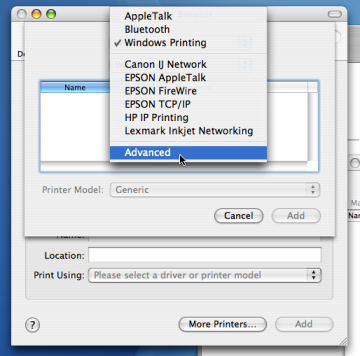
Click the button to add a new printer.
Option-Click . (Important: Hold the Option key down)
Select Advanced from the top drop-down list.
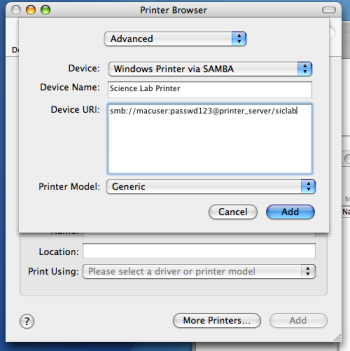
Select a Device of Windows Printing via Samba.
In Device name, enter a friendly and informative printer name.
Enter a Device URL in the form:
smb://username:password@server_name/printer_nameWhere
usernameandpasswordare the user's domain account login details.server_nameis the name of the server hosting the printer, andprinter_nameis the printer's share name.Select the Print Model to install and configure drivers.
Click the button.
Test print and ensure jobs are logged in PaperCut NG under the user's network identity.
To install the PaperCut NG client software:
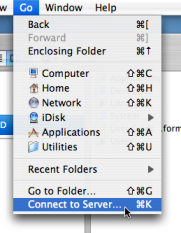
Open the Finder and select Go -> Connect to Server....
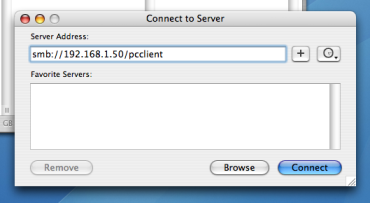
Enter
smb://servername/pcclientwhereservernameis the name of the server hosting PaperCut NG.Drag the
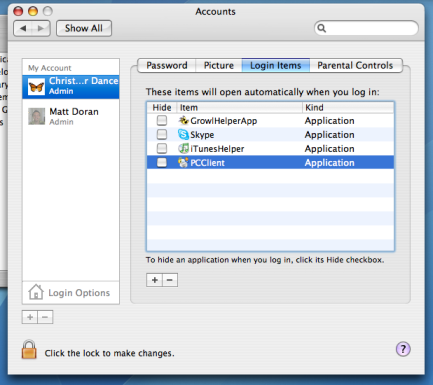
PCClientapplication across to the local Applications directory.Open System Preferences... from the Apple menu.
Select Accounts.
Click the Login items tab.
Click the button and select the newly installed
PCClientapplication.Restart the system and ensure the client starts upon login.