Schools and universities often have Macs available for student use in dedicated computer labs. In these environments the Macs are shared by many users and Scenario One is not appropriate. Larger Mac networks already using LDAP or Active Directory authentication, or planning on doing so, may wish to consider Scenario Three explained in the next section.
Scenario Two uses a popup authentication model. This is discussed in detail in the section called “Popup Authentication” and discussed further below:
The end-user's perspective:
The user sees the client tool (PCClient) running.
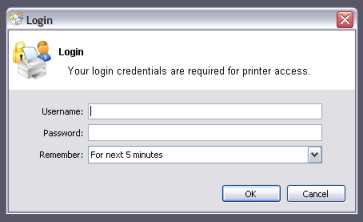
When the user prints a job, the client pops up a window requesting the user to enter a username and password. See the section called “Popup Authentication”.
The user enters a domain username and password.
If the credentials are valid, the job is charged to the user account.
The explanation:
The print event is performed as a generic user - for example "
macuser", "student", etc.In PaperCut NG, the "macuser" account is set up to use popup authentication by enabling the option Unauthenticated user. See the section called “Popup Authentication” for further details.
The popup requests the user to enter a username and password.
The password is authenticated and printing is charged against the supplied account.
Printers hosted and shared off a Windows, Mac or Linux server.
Mac systems set up to login under a generic account name. (e.g. macuser, student, etc.)
The domain contains a user account matching the generic account.
Domain account set up:
Log onto the print server or the domain controller.
Open Active Directory Users and Computers (or equivalent user management tool) from Start -> Administrative Tools.
Add a new domain user called
macuser.Define a password for
macuserand set the password to never expire.
Mac account set up:
Start up the Mac and ensure the system is connected to the network.
From the Apple menu select System Preferences...
Select Accounts.
Create an account called
macuser. Ensure the account's short name ismacuser.Set this account as the automatic login account, or alternatively make the password known to all users.
Set up the printers that the user requires access to:
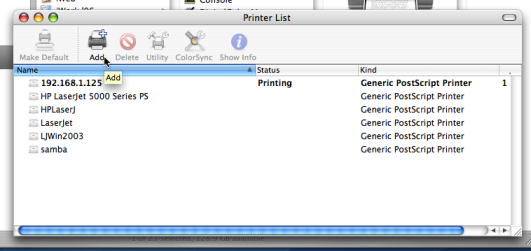
Open the Printer Setup Utility from Applications -> Utilities.
Click the button to add a new printer.
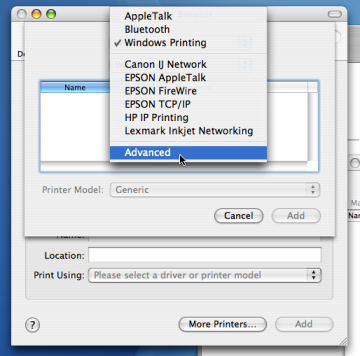
Option-Click (Important: Hold the Option key down).
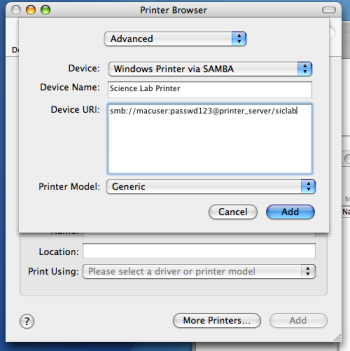
Select Advanced from the top drop-down list.
Select a Device of Windows Printing via Samba.
In Device name, enter a friendly and informative printer name.
Enter a Device URL in the form:
smb://macuser:password@server_name/printer_nameWhere
passwordis the password for themacuserdomain account,server_nameis the name of the server hosting the printer, andprinter_nameis the printer's share name.Select the Print Model to install and configure drivers.
Click the button.
Test print and ensure jobs are listing in the print queue under the
macuseridentity.
To install the PaperCut NG client software:
Start and Log into the Mac computer. Ensure it's connected to the network.
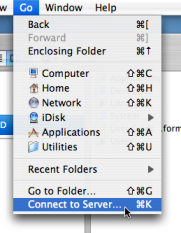
Open the Finder.
From the Go menu, select Connect to Server...
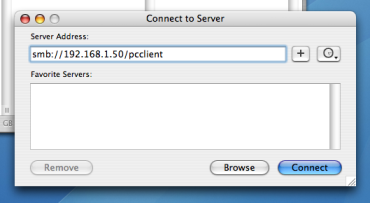
Enter the pcclient share's connection details like:
smb://server_name/pcclientWhere
server_nameis the name of the server hosting the PaperCut NG server software.Enter password information if requested.
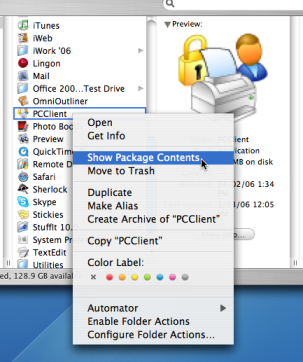
Drag the
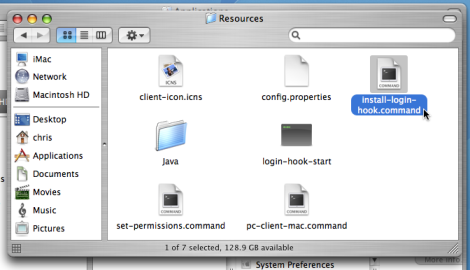
PCClientpackage over to the local hard disk's global Applications folder. The copy process will commence.Command-click on the newly copied
PCClientapplication in the Applications directory. Select Open Package Contents.Browser to
Contents/Resources/.Double-click on the
install-login-hook.commandscript.Restart the system and verify the client starts on login.
Configure the popup settings:
Log on to PaperCut NG's administration interface as built-in
adminuser.Select the
macuseraccount from Users.On the
macuser's details screen, set the account balance to zero.Ensure the user is set to Restricted.
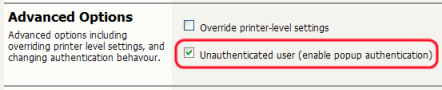
Check the Unauthenticated option and save the changes.
Click the button to save the changes.
Testing:
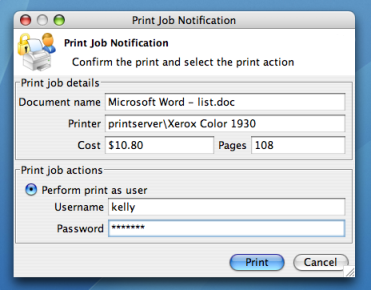
Log on to a Mac. Verify that the
PCClientprogram starts automatically.Print to the newly set up printer. On the server's print queue the job appears under the user identity of
macuser.The popup should display on the Mac. Enter a valid domain username and password.
The corresponding user should be charged for the job.