Table of Contents
- Customizing the User Client Tool window
- Limiting the list of interface languages/translations
- Customizing the User web pages
- Customizing the Administration Web Interface
- Customizing Report Headers
- Data Access and Custom Reports
- Automation and Scripting
- Custom User Directory Information Providers
- Enabling ports 80 (HTTP) and 443 (HTTPS)
PaperCut NG is an important part of network infrastructure at many thousands of organizations. Having the ability to seamlessly integrate PaperCut into an existing network is important. There are a number of ways to ensure end-users see the system as part of the network rather than an add-on. These include:
Changing the URL or link on the User Client window
Customizing the look and feel of the use web pages
Using the PaperCut NG back-end data in other procedures such as custom reports
This section covers some of the customization options available within PaperCut NG. For general information about the user client, see the section called “User Client”.
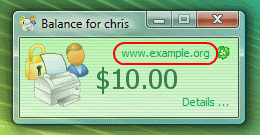
The pc-client.exe program displays a small window highlighting the current logged
in user's current account balance. This window contains two links. One called Details
that takes the user to the User Pages login. The other defaults to the PaperCut Software
website. The link to the PaperCut Software website can be replaced. Some suggestions include linking to your
organization's website or intranet site, or linking to a page containing your organization's network usage
policy. The logo used on the window can also be customized.
To change the link on the User Client window:
Login to the system as an administrator (e.g. the built-in
adminaccount).Navigate to the Options section.
Scroll down to the Client software section.
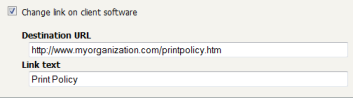
Select the option Change link on client software.
Enter a Destination URL pointing to your new destination. The link should be a complete URL including the
http://component. e.g.http://www.myorganization.com/printpolicy.htm.Under Link text enter the text that should be displayed. e.g.
Print Policy.Press the button to the right to apply the changes.
The next time the client tool is started on one of the workstations, the new link will be displayed.
There are other configuration keys that allow an administrator to customize the user client for their organization. The table below outlines all of the client customization config keys available. The value of these config keys can be updated using the Config Editor. Please see the section called “Using the Config Editor” to find out how to change config keys.
| Config name | Description |
|---|---|
client.config.show-link |
Indicates whether the link at the top of the user client should be displayed. To display
set the value to |
client.config.show-details-link |
Indicates whether the "Details" link that points to the user web interface is
displayed. To display the link set the value to |
client.config.show-document-cost |
Determines whether to show the document cost to the user in print popup notifications.
To show the cost set the value to |
Table 16.1. User Client Customization Config Keys
The logo used on the User Client balance window and the account selection dialog can also be customized by placing
a file called client-logo.png in the directory [app-path]/client/[platform] -
the same directory as the executable. The image must satisfy the following requirements:
Comply to the PNG (Portable network graphic) format.
A size of 64px by 64px.
Display correctly on different background colors (make use of transparencies or alpha channels).
On the Apple Mac platform the process is a little more involved. The image needs to be placed inside the App package at:
PCClient.app/Content/Resources. To access this directory, Option-click on the PCClient icon and select
Show package contents....
The user client can also be configured by passing command-line parameters to the program. This is described in the section called “User Client Options”.