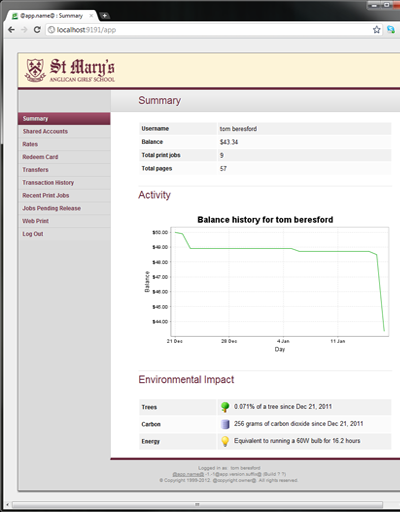
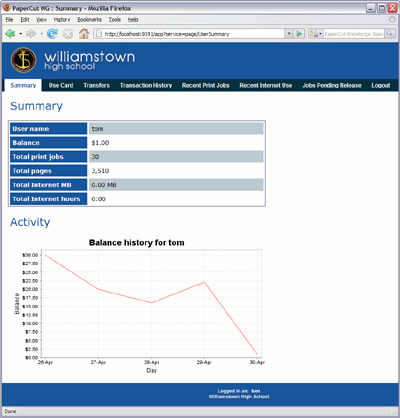
The user pages display information about the user's account and provide access to features such as TopUp/Pre-Paid Cards. The visual design of these pages can be tailored to make them fit into the look and feel of an existing internet or intranet site. This gives the pages an official look ensuring your users see the system as an important part of your organization's network.
PaperCut Software International Pty Ltd offers a service where their developers will undertake design work based on an existing website. If you would like assistance with the customization, please email the PaperCut Software International Pty Ltd support team.
Organizations whose staff have good to advanced HTML experience may choose to customize the pages in-house.
The design of the user pages is controlled via HTML "include" files for the header and footer areas of
the page, with page styling controlled via Cascading Style Sheets (CSS). Placing the following files in
the PaperCut NG directory structure at [app-path]/server/custom/web overrides page
layout and style.
| Filename | Description |
|---|---|
|
If this file exists, the contents of |
|
If the header include file exists, the HTML in the header area of the pages is replaced
with the contents of the file. This file should be saved in |
|
If the footer include file exists, the HTML in the footer area of the page is replaced
with the contents of the file. This file should be saved in |
| If this file exists, the logo on the web-based login page is replaced with the supplied image. The file should be an image of size 250px by 64px in PNG format. |
Table 16.2. Files used to customize the user web pages
Tip
Any custom content placed in [app-path]/server/custom/web/, such as additional
images, can be accessed via a URL beginning with /custom/. For example if a
file named header.jpeg is placed in
[app-path]/server/custom/web/ it can be accessed via the URL
/custom/header.jpeg.
Tip
To save a file in UTF-8 encoding on Windows using Notepad, change the Encoding option to UTF-8 on the dialog.
Note
Why the "2" in user2.css etc.? In previous versions of
PaperCut these files did not contain a number. The numbers are there to maintain
backwards compatibility for existing user web interface customizations, so that as the default look
of the interface is updated in new versions, your customized look is maintained. Please remove the
"2" for older installations.
Some organizations may benefit from providing additional login instructions to users. This can be useful for explaining which username or password to use (in the case there are multiple logins or passwords at the site).
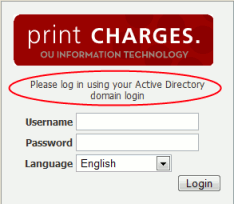
A custom message may be displayed on the login page using the following config key:
| Config name | Description |
|---|---|
display.login-instructions | A message to be displayed on the login screen, above the username and password fields. |
Table 16.3. Custom login instructions config key
Please see the section called “Using the Config Editor” for more information about changing the value of config keys.
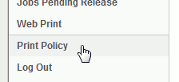
The navigation menu in the user web interface contains links for the PaperCut services that are enabled and available to the user. In some cases it may be desirable to add additional external links to this menu. Examples include:
Linking to a print policy page on the organization's intranet.
Linking to a page with key contact details.
A link to return to the "main" intranet page/portal.
Custom links will appear above the Log Out item.
To add a custom link:
Log into the admin interface and navigate to → → .
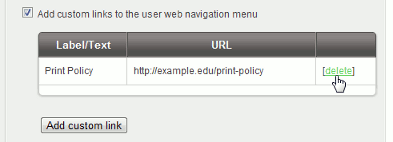
Enable the option Add custom links to the user web navigation menu.
Click the button that appears.
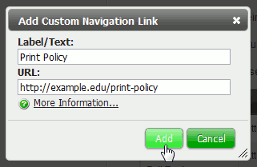
Fill out the Label/Text and URL fields in the dialog that appears after clicking the button. Label/Text is the text that will appear in the navigation menu, and URL is the destination of the URL when clicked.
The link will now appear in the user web interface.
Existing custom links are displayed in the admin interface under the Add custom links to the user web navigation menu option. Links may be deleted by clicking the [delete] link next to the relevant link.
The URL in custom navigation links may also contain special replacement fields. E.g. the
%user% in http://example.edu/print-policy?u=%user% is
replaced with the logged in username to create a URL like
http://example.edu/print-policy?u=tom.
The available special replacement fields are as follows:
| Field | Description |
|---|---|
%user% | The username of the logged in user. |
%full_name% | The full name of the logged in user. |
%user_id% | The id/card number of the logged in user. |
%user_email% | The email address of the logged in user. |
%user_office% | The office of the logged in user. |
%user_department% | The department of the logged in user. |
%return_url% |
A URL that can be used to send the user back to the user web interface. The user will be sent back to the Summary page as if they had just logged in, assuming their session has not timed out. |
Table 16.4. Fields available for replacement in custom navigation links in the user web interface
A graphical map or other custom content may be used instead of the default printer selection list in the Web Print wizard. For more information see the section called “Designing Printer Maps / Custom Printer Selection Lists”.