Important
The following section assumes the reader has knowledge of general Mac OS X server management. Although the installation process is graphical, knowledge of the command-line, creating users, editing configuration files and an understanding file permissions would be of assistance.
PaperCut NG can be set up on a conforming Macintosh system currently hosting printers. This quick start guide walks through the installation process step-by-step. An outline of the main tasks include:
Check system requirements
Create the host user account
Download and install
Run the configuration wizard
Configure printers
Print a test document and verify charging has occurred
Share client software to workstations
Access and print from another workstation
The quick start guide provides a basic overview of the installation and configuration procedure. For a detailed explanation of Mac printing in detail, please see Chapter 19, Mac Printing in Detail.
Before proceeding with the installation the system administrator should take a few moments to verify system requirements. Is the operating system version supported and are patches up-to-date? Take a few minutes to verify the system is current and supported (see the section called “System Requirements”). A system prerequisite is Java version 5.0 or higher. If Java 5 is not already installed, the installer is available from the Apple website at: http://www.apple.com/support/downloads/java2se50release3.html.
Administrators should ensure that the print queues are set up and working as expected before attempting to install PaperCut NG.
In a multi-user environment, printers are often shared over the network. On Mac servers, print queues are shared via CUPS using IPP (Internet Printing Protocol). It is important that other workstations on the network print to the server's print queues rather than connecting directly to the printer. On a Apple Mac workstation, an IPP printer should be added pointing to the server's IP address. The standard procedure can be summarize as follows:
Install the printers on the server using the manufacture's suggested procedure. For convience, give the printer a simple name without spaces. Network printers connected via JetDirect (socket) or LPR are recommended. Test local printing directly from the server.
Ensure printer sharing is enabled. System administrators running firewalls should also confirm that port 631 (the standard CUPS port) is accessible from the local network.
Add the printer(s) on the workstation(s) using the Printer Setup Utility. Select IP Printer and the IPP - Internet Printing Protocol. Enter your server name/IP and the name of the printer setup in point 1.
Print form the workstation and confirm that printing is logged in PaperCut NG.
If the printers are currently not installed and configured, this task should be performed and verified before proceeding further.
PaperCut NG runs under a non-privileged user account called "papercut".
This invisible system account is created automatically upon first install. Advanced system administrators
may however have a preference to create this account manually. If you fall into this category,
create the papercut account now prior to installation.
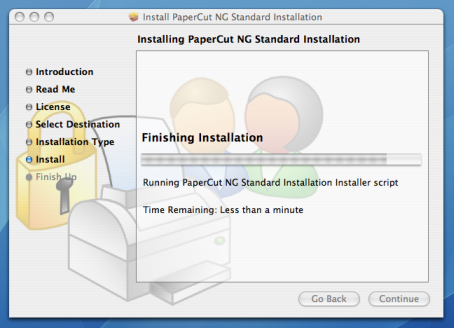
PaperCut NG is supplied as a standard disk image containing the installer. Log on as an
admin level account. Download and double-click Mac installer. Double-click on the installer
package named PaperCut NG Standard Installation.pkg. Follow the directions on the screen. The
installation process will take between two and five minutes depending on the speed of the system.
The default install location is /Applications/PaperCut NG
Important
Make sure you're installing the correct package. The similarly named
PaperCut NG Secondary Server Installation.pkg only installs part of the application
and is designed for more advanced networks.
After the installation has completed, the installer will open a web browser at the address
http//[server_name]:9191/admin. If the browser does not open, double-click on the
file located at /Applications/PaperCut NG/Admin Login.URL.
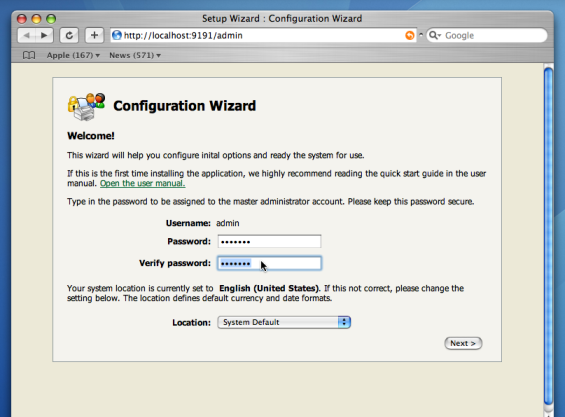
The browser will display the configuration wizard and must be completed before the system can be accessed.
Important
The Application Server listens for connections on port 9191. Ensure that any local IP firewall is configured to allow local network traffic on ports 9191 and 9192 (SSL). The Mac firewall settings are located under → → .
The configuration stages in the configuration wizard are explained below.
This is the master password for the main admin account. This password is independent of the operating system or domain passwords. Keep knowledge of this password secure!
Tip
Treat this password like your router/modem management passwords. It is independent of your network domain or local system accounts and needs to be kept secure.
This is the default cost-per-page assigned to the printers. This setting can be changed on a per printer basis after installation. Choosing a sensible cost now will help minimize future setup. For example in the USA, a value of $0.05 would be appropriate for many standard black & white printers.
Users can be assigned an initial starting credit. This ensures they have funds in their account as soon as the system is enabled. An option also exists to control what happens when users run out of credit or exceed their quota. If you are evaluating PaperCut NG it might be appropriate not to disable printing when a user's funds run out. This way you can be assured that user printing is not disrupted during the evaluation. These settings may be changed after setup.
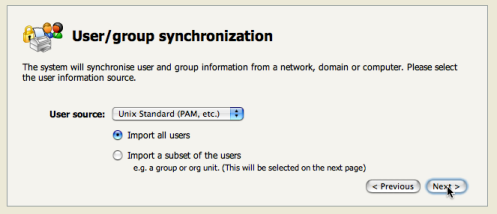
PaperCut NG imports user information out of the system or domain. Three options are available on the Mac:
Mac Standard (PAM, Local NetInfo, etc.)
LDAP
Samba
Select Mac Standard if the user accounts are setup and defined on the local system as standard Unix accounts or mapped into the system from a central directory service such as LDAP. Most large established networks will use this option.
The LDAP option is appropriate for large networks with existing LDAP domains. This includes networks running Mac OS X Server with Open Directory, and Windows domains running Active Directory.
More information on LDAP is available in the section called “Using LDAP for user synchronization”.
The Samba option is appropriate on medium to small networks currently operating in a Windows Domain environment.
The Samba option requires additional information such as the name of a domain server, and login credentials for an Administrator level account. This information is requested on the subsequent wizard screen. Take care to ensure this information is complete and correct.
During evaluation, most sites will opt to import all users from the system/domain into PaperCut NG. An option also exists to import a subset of users from a given group. This option is pertinent when it is known that only a subset of users will only ever use the printers.
After completing the configuration wizard you will be presented with a user synchronization status screen. After this is completed, the interface will offer an option to . Take some time to log in and browse the interface. There are many options and now is a good time to have a look at some of the key areas of the application. Take some time to explore!
PaperCut NG works by hooking into the CUPS print system. The hook is implemented on a per printer basis and by default all printers are monitored. If the system currently hosts printers in a "production environment", it may be advisable to only initially enable monitoring on a single printer. After successful initial testing, the monitoring can be re-enabled on all other printers.
The simplest way to enable/disable monitoring on a printer is to execute the command script at
/Applications/PaperCut NG/Configure CUPS.command. This script
allows the administrator to enable/disable PaperCut NG on selected printers. Please read
the script's instructions carefully and also ensure that the Print Setup Utility
is closed/quit when running this script.
Note
At the technical level, Macs use the Common Unix Print System (CUPS). PaperCut NG tracks printing by integrating
with CUPS. (For system administrators familiar with CUPS, PaperCut NG integrates by wrapping or proxying
the CUPS backend). The Configure CUPS.command script simply edits the file
/etc/cups/printers.conf and prefixes the DeviceURI
with "papercut:", enabling monitoring on the selected printer.
System administrators with command-line UNIX experience may prefer to edit the printers.conf
directly with a text editor.
To detect and register the printer with the PaperCut NG system, a test print job needs to be performed on each printer (printers are added to the system on first print). Perform a test print on each printer and verify that it is now listed in the PaperCut NG interface under the Printers. Perform a number of test prints to verify that multi-page documents are accounting as expected. Repeat this process for each printer.
PaperCut NG includes optional client software. The client software can be run on workstations to provide users with popup messages, feedback on their account balance, and access to advanced features such as shared accounts.
Client software is usually made available to workstations by "sharing" the
/Applications/PaperCut NG/client folder in a read-only form.
Common sharing methods on Mac system include:
AFP - used to share to other Mac Systems. Mac OS X Server tools such as the Workgroup Manager or other 3rd party tools such as SharePoint may help with sharing the client directory via AFP.
Samba - used to share files to Windows based workstations. Mac OS X Server tools such as the Workgroup Manager or other 3rd party tools such as SharePoint may help with sharing the client directory via Samba.
Advanced system administrators may be comfortable sharing this directory by hand-editing the
/etc/smb.conffile. The following configuration will share the directory in read-only form:[pcclient] path = /Applications/PaperCut NG/client comment = PaperCut Client public = yes only guest = yes read only = yesNFS - to share to Linux/Unix based workstations.
The following section assumes the remote system is a Mac based workstation.
Log onto a remote workstation as a standard user. Check that the workstation has the monitored printer available under → → .
Print a test document such as a web page or a text document.
Start the client tool by opening the Finder and browsing to the share set up in the previous step. For example, → → .
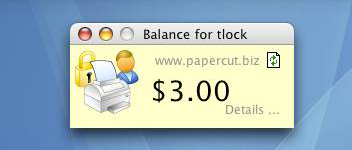
Run the application
PCClient.app. The account balance window should display.Click on the Details link. The web browser should open. Alternatively you may open a standard web browser to the URL
http://[servername]:9191/user. Enter the user's username and password. You are now in the user section.Click on the print history section. Your test print job should be listed.
Important
The client tool is optional and not required for monitoring or charging. It provides:
A quick overview of the user's account balance
A way to access to user pages with one client
Deliver messages to the users
Advanced features such as the account selection popup
The client is usually set to run automatically when the user logs into the system. Setup and deployment is covered in detail later in this manual (See the section called “User Client Deployment”).
This concludes the Quick Start Guide (for Mac Servers). You may like to take some time to explore the features of PaperCut NG before continuing reading at Chapter 2, Implementation by Example or Chapter 3, Quick Tour.


