Cards are generated using the Card Wizard. The card wizard is a Microsoft Windows application that integrates with Microsoft Word. The card wizard install can be downloaded from inside the PaperCut NG administration login under the Card section. The download link is located in the Actions area.
Important
The Card Wizard integrates with Microsoft Word. Please ensure that Microsoft Word is installed before using the Card Wizard.
| Term | Definition |
|---|---|
Card Wizard | A tool to help administrators produce a set of cards. The wizard generates cards ready for printing and a number definition file suitable for importing into the PaperCut NG system. |
Card Number | All cards are designated a random unique number. PaperCut uses this number to identify the card and its value. Users enter this number to allocate the credit to their account. An example number:
P0409-1945-4833-5750-4452
|
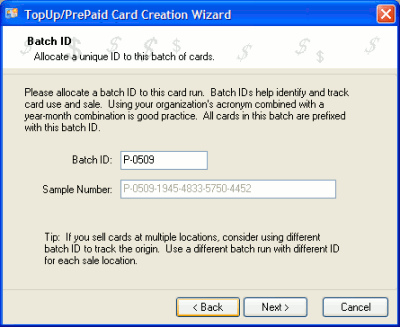
Batch ID | A batch ID is a user defined ID or number assigned to all cards in a batch. The batch ID will prefix all card numbers and are used to identify the source of a card. A unique number should be assigned to each batch. |
Valid Till Date (Expiration Date) | Define the date on which a card can no longer be used. It's analogous to a “use by” date on a gift certificate. Expiration dates ensures cards only remain in circulation for a limited period of time. A six to 12 month period is recommended. In a school environment it may be useful to define an expiration date as the last day of the semester. |
Mail Merge | Mail merge is an advanced feature of Microsoft Word. The mail merge feature takes a design template and a data source, and merges the two together to construct a composite document. In the card wizard's case, the number list is the data source and the design template is the template Microsoft Word document. |
Number Definition File | The number definition file contains information on all cards in a batch including a list of card numbers, their expiration date, and value. The card wizard creates this file during the generation process and the system administrator will import this file into the Card administration section. |
Card Number Entry Page | The card web entry page is a designated page inside the user login section. |
Table 13.1. Card Terminology
This section will walk you through the process of creating a batch of TopUp/Pre-Paid Cards. The example covers creating a batch of 100 cards of value $10.00 each.
The Cards feature is accessed via the Cards tab. If there is no Cards tab, enable the feature by navigating to the Options section and selecting Enable use of TopUp/PrePaid Cards. Click Apply.
Log onto a desktop system with Microsoft Word installed (normally not the server!). Open a web browser at:
http://[server_name]:9191/admin
Log into PaperCut NG as admin and navigate to the Cards section.
Download the card wizard from the Download card wizard action. Run the install program
and complete the installation process.
Enter a unique batch ID to define this batch and click . We recommend adapting a consistent convention. For example, choose numbers representing the date, or a sequential numbering scheme.
The wizard offers a choice of two popular card number formats. The Numeric format is the most secure and generates long numbers. The Alphanumeric format produces a shorter format consisting of letters and numbers. The Alphanumeric format is a little less secure due to the reduced number of possible permutations, however it does offer a shorter, more convenient entry format.
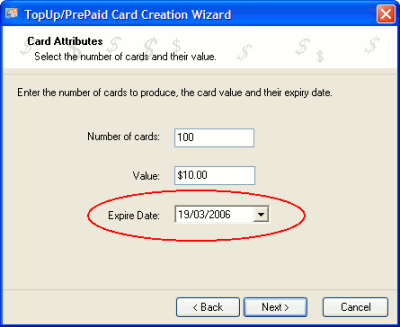
Ensure that the number of cards is set up to 100 and the value of each card is $10.00. By default the valid till date is set 6 months in the future. We recommend defining an appropriate date that corresponds to a fixed event such as the end of the year, budget year, term or semester.
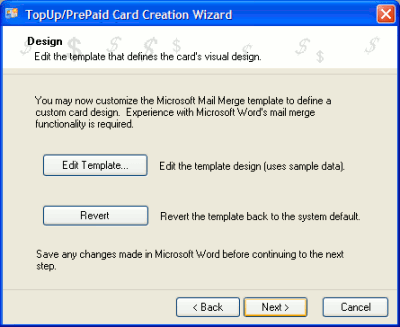
To produce a set of standard cards, custom design is not required. Simply click the button to move to the next step. Modifying the custom design requires knowledge of Microsoft Word's mail merge functionality. See the the section called “TopUp/Pre-Paid Card Tips” for further details.
Press to generate the card numbers. The card wizard will prompt you for a location to save the number definition file. Save the file on the local hard driver or a secure network drive.
The card wizard will now generate a merged Microsoft Word document. Before generating the Word document, the card wizard will ask you if Macros have been enabled in Microsoft Word. If the answer is no, or you are unsure, please say and the card wizard will guide you through the process of enabling Macros. The card wizard uses Word Macros to automate much of the card generation process.
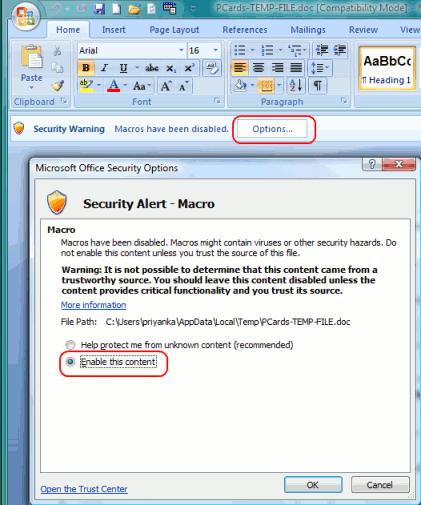
If using Word 2007, after opening the document a Security warning is displayed on the Message Bar. You will need to enable macros by selecting "Enable this content" after clicking on "Options" on the Message Bar.
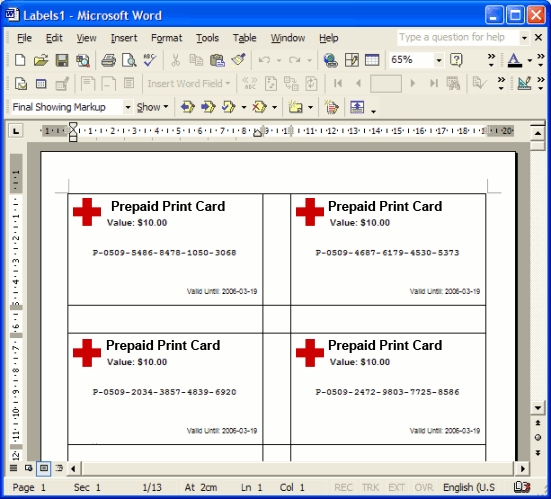
A new Microsoft Word document will open, listing all 100 cards. The cards are standard business card size suitable for printing on heavy paper and cutting with a paper cutter. For a professional look, consider forwarding a PDF version to your local printing shop. See the section called “TopUp/Pre-Paid Card Tips” for more ideas.
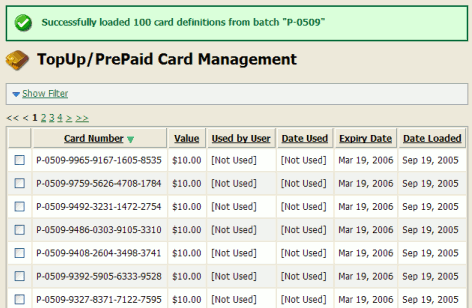
The final step is to activate the cards by importing the number definition file in the PaperCut NG admin section.
Navigate to the Card section.
Select the Import New Cards action.
Click the button and locate the number definition file as saved in step 5 above.
Click the button.
The PaperCut NG card system is designed with security in mind. All fraudulent card redemption attempts are detected, trapped and logged. The number allocation system is highly secure and guessing a number is “statistically impossible”. With 1,000 cards in circulation, the chance of guessing a number is 1-in-10,000,000,000,000, or in non-mathematical terms, it would take over 300,000 years to guess a number if a person enters one number every second!
Like many IT security systems, the weakest link in the system is the human interface. Cards are a form of virtual currency. Care should be taken to protect the cards from unauthorized access and disclosure.
Ensure the generated Microsoft Word document is deleted or saved in a secure place after the cards are printed.
Always delete the number definition file after importing the batch into PaperCut.
Never leave the cards in an unsecured or visible location. Consider sealing cards in envelopes.
Check the PaperCut NG application event log on a weekly basis for security messages. PaperCut will log and trap unauthorized card use.
Use the card log to track card redemption and allocation.
Cancel/Expire lost or stolen cards by batch number as soon as the problem is reported.
Important
The cards are like a form of cash and should be treated with the same care. Make sure the cards are carefully secured.
The button in Step 4 of the card wizard opens the standard card template for editing. The card wizard is able to use any standard mail merge design. It's even possible to convert the template layout to letters rather than cards. Microsoft's mail merge support is designed for Word “power users”. Consider taking the step-by-step mail merge tutorial provided with Microsoft Word help if you do not have experience with Word's mail merge functionality.
Consider keeping your customizations initially simple and work up towards more complex configuration.
To change the logo graphic:
Click the button in step 5.
Say to Enable Macros.
Select the standard PaperCut logo on the first card and press the Delete button on the keyboard.
Select → →
Locate the desired logo and click .
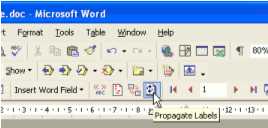
If using pre-2007 MS Word click on the button on the mail merge tool bar. The new logo should propagate across all cards on the page.
In MS Word 2007, click on the button on the Mailings tool bar.
Repeat the steps above to change other working and layout as required. Always change the first card then press the or button to apply the changes to all cards. IMPORTANT: Do not accidently delete the special
<<Next Record>>field as this cause the merge to move to the next card number before printing the next card. Removing this will result in all cards displaying the same card number.Click → and close Microsoft Word.
Test the template by running a batch in the card wizard.

Tip
Design Recommendations:
Consider changing the logo and adding your organization name
Change the URL reference to point to your intranet site or event your network/card policy page.
Provide basic instructions on how to redeem the card or the location of an information page.