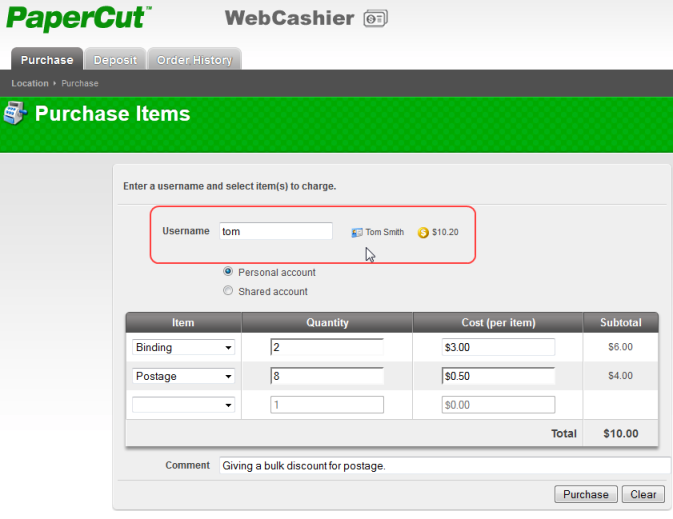
To charge Tom's personal account for "Binding" and "Postage" the Web Cashier user will:
Log into the PaperCut Web Cashier using the URL
http://[server-name]:9191/webcashier.Enter your network credentials.
Search for the user by entering their username or full name. It will display user's full name and current balance on the left.
Select the "Personal account".
Now select "Binding" from the item list.
The default item price will be visible when you select the item. It can be modified if needed. (e.g. give discount for teaching staff)
Enter the quantity. PaperCut will calculate the total item price.
Now add a second item - "Postage"
Give a discount by changing the cost (per item).
Enter an optional comment. For example this may be used for recording the reason for an exception/discount/charge.
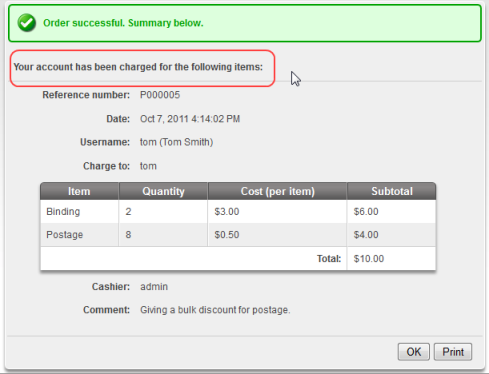
Press button. Tom's balance will be debited with the transaction value and an entry is made in the account's transaction history.
An Acknowledgement slip is displayed on the screen and may be printed using the button.
The text displayed on the top of the acknowledgement slip is configurable. See the section called “Advanced Web Cashier Configuration” for more information.
If previoulsy configured by the PaperCut NG adminstrator, Tom is automatically emailed a copy of the acknowledgement slip. To set up a SMTP server see the section called “Configuring Email Notifications”.