Table of Contents
PaperCut's advanced scripting interface is a powerful and flexible feature that can be used to define and fine tune your printing policy. While there are many features that can be enabled by ticking checkboxes and changing options in the admin interface, scripting your own behavior introduces a whole new level of customization.
The functionality made possible by scripting is varied and is constantly being extended based on customer demand. Some common uses include:
Displaying a popup message if a user forgets to select duplex on large jobs.
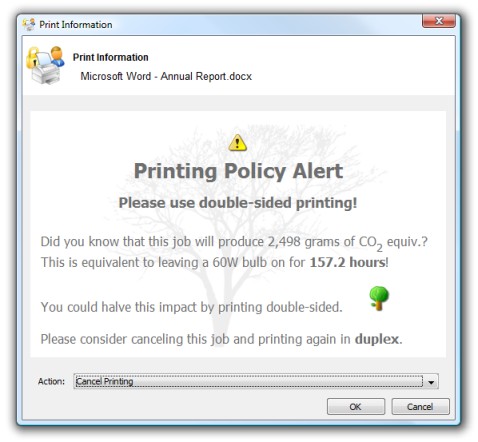
Showing a dialog that displays environmental impact statistics about a user's print job such as the amount of carbon dioxide equivalent greenhouse gases produced.
Prompting the user to confirm large jobs before printing.
Automatically routing large jobs to more efficient high volume printers.
All of the above is possible by writing a small script directly into a code editor in the admin interface. In fact, the above functionality is a pre-built recipe ready to use.
Other usage examples include:
Requesting job data/security classification.
Giving discounts during off-peak times.
Charging printing to departments during class-time.
Displaying warning messages under selected conditions.
and many, many more.
At a high level, advanced scripting provides the ability to:
Adapt logic based on print job attributes such as cost, pages, document name, time, etc.
Modify job attributes and behavior such as routing the job to another printer, influencing job cost and account charged, and appending metadata such as comments.
Interact with end users via client messages and pop-ups/dialog boxes.
Writing print scripts brings many possibilities but also introduces the possibility that writing a buggy print script results in unexpected behavior. Previous experience with scripting or programming is strongly recommended. PaperCut NG does provide a number of tools to assist with script development, however, including:
A mini JavaScript editor with basic error checking and syntax highlighting.
Quick access to a code cookbook containing dozens of best-practice recipes.
Pre-canned "code snippets" demonstrating the use of key functions.
Simple debugging tools such as logging and runtime error reporting.
All of PaperCut NG's advanced scripts are written using the world's most popular scripting language, JavaScript (also known as ECMA-262 ECMAScript... apparently ;).
Note
Why JavaScript?
JavaScript was selected as PaperCut NG's scripting language after careful consultation with the existing user base. JavaScript was the language common to system administrators across all platforms (Windows, Mac and Linux). Its popularity in HTML programming also meant most administrators already had extensive exposure to the language.
Internally PaperCut uses the Rhino scripting engine maintained by Mozilla.org, makers of the popular Firefox browser. It is highly performant and allows PaperCut NG to leverage advanced scripting without compromising system scalability. This is done using advanced techniques such as just-in-time compilation.
Print scripts are segments of code that are run whenever a new print job arrives in the queue. The
script is defined using the concept of a "hook". A hook is a JavaScript function (e.g.
function printJobHook(inputs, actions) { }) that is called for each new job. Your
print script defines this method, its behavior and its actions.
Print scripts are defined via → → .
All scripts are defined on a per printer basis allowing each printer to have its own logic (although it is possible to share/copy a common script between printers, see the section called “Copying Printer Settings”). Script code is entered into the editor and once completed can be saved using the Apply button. Errors raised by the script are displayed on this page.
Tip
One good way of experimenting with print scripting is to apply your script initially on a test printer (or fake print queue such as a print queue pointing to an unused LPT port). This will allow you to test and experiment, and when the logic is right, copy/deploy across to other live printers.
Error messages are classed into two groups:
Syntax errors - these are detected and displayed when a script is applied. The script will not save until all syntax errors are addressed.
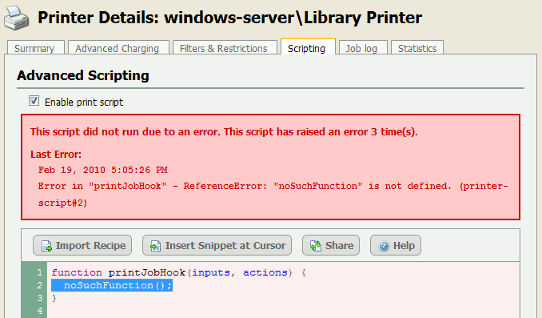
Runtime errors - these are errors that only occur when a script is executed for a print job. Runtime errors are also listed on the Scripting tab in red. You may need to refresh the page to see runtime errors. Runtime errors are also logged and can be found on the App Log tab.
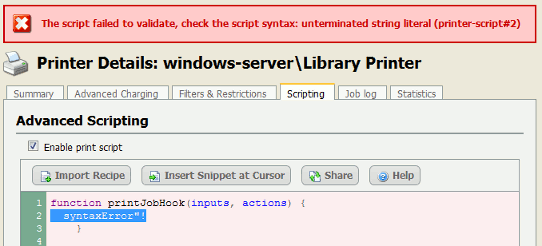
Where possible the error message will indicate the line number on which the error was found and the relevant line will be highlighted.
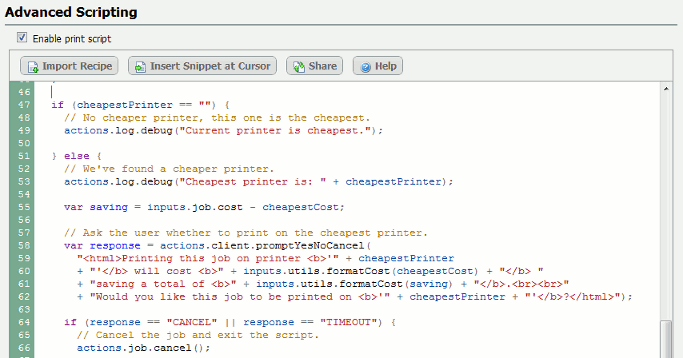
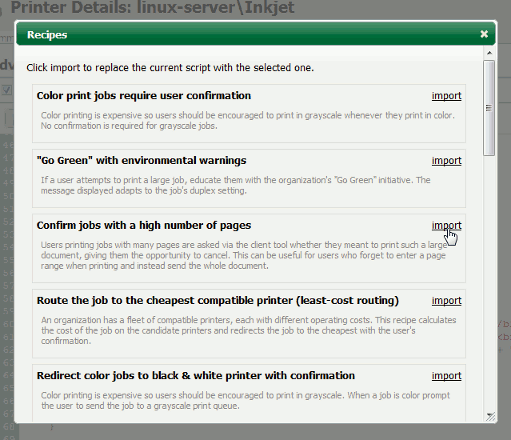
The best way to start out writing print scripts is to first experiment with some of the recipes. Try importing a recipe on a test/non-production printer using the Import Recipe button. Recipes demonstrate best practice and should be considered as a starting point for development of your own scripts.
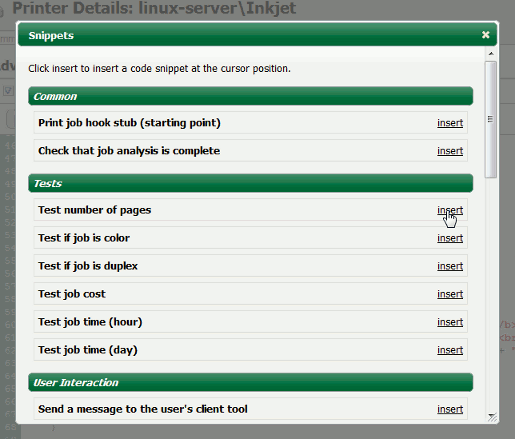
Code snippets are small code fragments that demonstrate how to use make best use of the scripting API (inputs, functions and methods). Consider using snippets as a base for adding functionality to your script. Snippets are inserted at the current cursor location and accessed via the Insert Snippet at Cursor button.
Use snippets and/or recipes where possible. They are tested and demonstrate best practice.
Start out small and aim high. Don't try building your script all in one go. Write a bit, test, then move on. Large scripts written in one go are hard to debug.
Always test your scripts! Just because a script compiles does not mean it is bug free. Take time to test your script and exercise all logic paths. For example, if your script applies an action to jobs with more than 100 pages, test it by printing jobs that are both more and less than 100 pages.
Check all your scripts from time to time for runtime errors and/or enable error level event notifications to receive an email when errors occur (see the section called “Error level event notifications”).
Take some time to explore the list of methods in the reference API documentation (see the section called “Print Script API Reference”). Knowing what is possible will open up ideas.
Use
actions.log.debug()oractions.client.sendMessage()to assist with "print line" style debugging.If your scripts interact with end-users, perform some usability testing to ensure they understand your messages and intentions.
Consider using HTML markup to pretty up your dialog messages (see the snippet titled Show a dialog with HTML formatting).