
Quick install: Windows
This guide assumes that you are using Windows Server 2008. The process is similar for other Windows operating systems such as, Server 2003 or Windows 7. If you're upgrading from a previous PaperCut MF version, refer to the directions outlined in Upgrading from a previous version.
Step 1 - System requirements & network setup
Before installing PaperCut MF for either evaluation or production use, the SysAdmin should take a few minutes to verify system requirements.
-
Is the operating system version supported and patches up-to-date? Take a few minutes to verify the system is current and supported (see System Requirements).
-
In workgroup environments (i.e. where no domain is present), some additional configuration is required. For more details see Running in a Workgroup environment.
-
Are printer(s) installed and hosted on this system? PaperCut MF needs to be installed on the system directly hosting the printer(s). Install the printer as a "Local Printer" with a connection method such as TCP/IP Port, LPRThe Line Printer Remote protocol (LPR) is a network protocol for submitting print jobs to a remote printer. A server for the LPD/LPR protocol listens for requests on TCP port 515. A request begins with a byte containing the request code, followed by the arguments to the request, and is terminated by an ASCII LF character. An LPD printer is identified by the IP address of the server machine and the queue name on that machine. Many different queue names may exist in one LPD server, with each queue having unique settings. The LPR software is installed on the client device., or JetDirect or directly connected to the system via USB or LPT Port.
-
In a multi-user environment, printers are often shared with other network users. Other workstations should connect to these printers as "Network Printers". Ensure workstations are configured to print to the shared print queues. For example, a Windows workstation might connect to a printer via a path like: \\[samba_server]\[printer].
-
Ensure that printers are configured correctly and work before installing PaperCut MF.

Figure 5: Network printer configuration
Step 2 - Print queue configuration
When using Release Stations or account selection popups, PaperCut pauses jobs on the Windows print queueA print queue displays information about documents that are waiting to be printed, such as, the printing status, document owner, and number of pages to print. You can use the print queue to view, pause, resume, restart, and cancel print jobs. to hold jobs prior to printing. It is important, especially in charging environments, that the queue is secured to prevent users from resuming jobs themselves and bypassing PaperCut. There are two ways a Windows print queue can be secured:
Configure the queue using the PaperCut TCP/IP Port.
Restrict the print queue security permissions to prevent users from performing management functions.
Using the PaperCut TCP/IP port
Queues configured to use the PaperCut TCP/IP Port automatically ensure that manually resumed jobs will not be printed. You will already be using a PaperCut TCP/IP Port if you are using hardware page countHardware page counts allow PaperCut to determine the actual number of pages printed rather than just the page count from the spool file. The hardware page count is used when jobs do not print completely, for example, the print job is canceled. These checks are performed at the hardware-level by communicating with the printer via SNMP (Simple Network Management Protocol). validation. You can see which port is being used in the Ports tab under Printer Properties. If you are not currently using PaperCut TCP/IP ports, see Windows printer queue configuration.
Restricting Windows print queue security permissions
This method works for most versions of Windows. However, it might interfere with printing on Windows 8.1 and Windows 2012R2. On these systems you should secure printing using PaperCut TCP/IP ports.
To restrict security permissions for a queue:
-
Log onto the server hosting the printers as an Administrator.
-
Open the printer configuration screen: Start > Printers
-
Right-click a printer; then select Printer properties.
-
Select the Security tab.
- Select the CREATOR OWNER user.
-
In the Permissions area, clear the Manage Documents check box.

-
Click OK.
-
Perform these steps for each of the monitored printers.

When using Windows 2008 Server, use the Server Manager, navigate to the Print Management Console and globally set the security permissions by right-clicking the Print Server(s) > Properties > Security and editing the permissions there. This applies only to printers added after the global permissions are changed, not for pre-existing printers.
Windows Server 2008 R2 only
Windows Server 2008 R2 installations can experience an issue where print jobs are not removed from the print queue when completed. These jobs stay in the queue with a status of 'Sent to Printer'. To work around this, configure the Printer Driver Isolation so that jobs are removed from the queue when completed.
Log onto the server hosting the printers as an Administrator.
Using the Server Manager, navigate to the Print Management Console: Server Manager > Roles > Print and Document Services > Print Management > Print Servers > PrintServerName > Drivers
Right-click a printer driverA printer driver or a print processor is a piece of software that converts the data to be printed to the form specific to a printer. The purpose of printer drivers is to allow applications to do printing without being aware of the technical details of each printer model.; then select Set Driver Isolation > None.
Perform these steps for each of the monitored printers drivers.
Windows 2008 R2 installations might require hotfix KB2906850 to be installed. Consult with your Microsoft experts regarding the suitability of this hotfix.
If you receive an "Access denied" error when changing both the CREATOR OWNER permissions and the Print Driver Isolation settings, turn off the Render print jobs on client computers found under the Sharing Tab for that printer.

Step 3 - Download and install
PaperCut MF is supplied as a standard Windows setup.exe install program. You can download the latest version from https://portal.papercut.com/products/mf/https://www.papercut.com. This installer automatically detects whether your operating system is 32 or 64-bit and installs a version of the software optimized for your system. After the download is complete, run the setup wizard as an administrator level user. A system restart is usually not required but administrators are advised to perform installation on live production systems during periods of low activity - for example, not during backup operations or other administration activities.
-
Double-click the setup.exe install program.

- Click Next.
- Select I accept the agreement; then click Next.
- Read the installation information; then click Next.
- Select Standard installation (primary server); then click Next.
- Click Next.
- Click Install.
Step 4 - Configuration Wizard
After you install PaperCut MF, a web browser is displayed with the PaperCut MF Configuration Wizard Welcome screen.
-
Administrative password

- Complete the following fields:
-
Password—enter the master password for the main in-built admin account. This password is independent of the operating system or domain passwords. The password must be at least six characters. Keep this password secure.
Tip:Treat this password the same as your router/modem management passwords. It is independent of your domain accounts and needs to be kept secure.
If you forget your password, you can reset it. For more information, see Resetting the Admin Password.
- Verify password—re-enter the password.
- Location—select the system's physical location and language.
- Click Next.
-
Organization type
The Organization type screen is displayed.
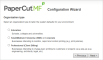
This selection determines which system defaults are used on setup.
- Select your organization type.
- Click Next.
-
Default cost for printing
The Default costs for printing screen is displayed.

You can change this setting on a per-printer basis after installation. Choosing a sensible cost now helps minimize future setup. For example, in the USA, a value of $0.10 would be appropriate for many standard black & white printers.
- Complete the following fields:
- Color (cost per page)—enter the default cost per page for color printing on all printers.
- Grayscale (cost per page)—enter the default cost per page for grayscale printing on all printers.
- Click Next.
-
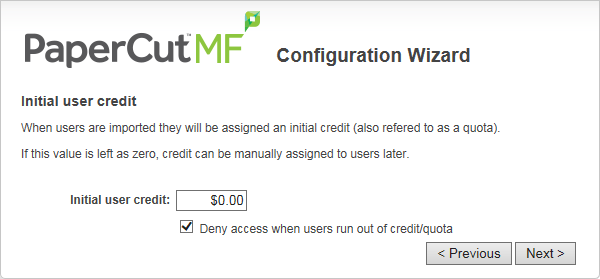
Initial user credit (Education organization type only)
If you selected Education as the organization type, the Initial user credit screen is displayed.
If you selected Small/Medium Enterprise (SME) or Corporate) or Professional (Client Billing) as the organization type, go to step 5.
-
Complete the following fields:
- Initial user credit—enter the amount of credit each/quota each user will receive when the system is first enabled. You can change these settings after setup.
-
Deny access when users run out of credit/quota—select this check box to prevent users from printing when they run out of credit/quota.
Tip:If you are evaluating PaperCut MF it might be appropriate not to disable printing when a users funds run out. This way you can be assured that user printing is not disrupted during the evaluation.
-
Click Next.
-
-
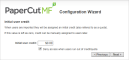
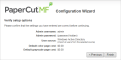
User/group synchronization
The User/group synchronization screen is displayed.
PaperCut MF extracts user information out of the system or domain.
Tip:During evaluation, most sites import all users from the system/domain into PaperCut MF.
-
In User source, select the source of user account data:
- Windows Standard
- Windows Active Directory
- LDAPThe Lightweight Directory Access Protocol (LDAP) is a directory service protocol that runs on a layer above the TCP/IP stack. It provides a mechanism used to connect to, search, and modify Internet directories. The LDAP directory service is based on a client-server model.
Note:In a domain environment, Active Directory is the default option as this offers access to Organization Units, Nested Groups, and other AD features.
-
Select one of the following options:
- Import all users—import all domain user accounts. This includes all system accounts as well as user accounts.
- Import users from selected groups—import a subset of users from a given group. This is useful when only a subset of users will use the printers.
- Use the Test Settings to test and confirm your settings before continuing.
-
Click Next.
Important:PaperCut MF automatically tries to detect the available directory services, saving you hours of potential configuration time.
-
-
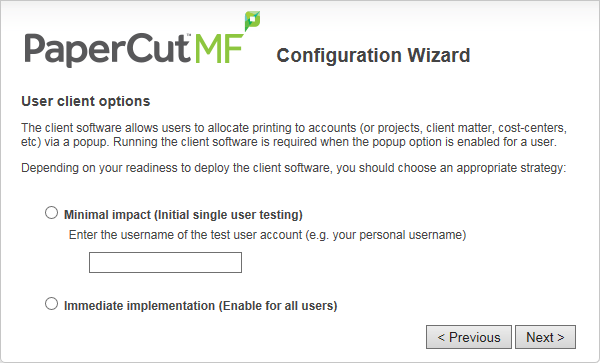
User Client options (Professional (Client Billing) organization type only)
If you selected Professional (Client Billing), as the organization type, the User client options screen is displayed.

If you selected Education or Small/Medium Enterprise (SME) or Corporate, go to step 7.
The User client allows users to allocate print jobs to client (shared) accounts. The process works by:
-
Pausing all jobs that enter the print queues.
-
Displaying a popup on the user's workstation asking them to allocate the print job to an account. This is done by selecting the account from a list.
-
After the user has responded to the popup, the job is released to the printer.
For more information about the account selection process and shared accounts, see Shared accounts.
The account selection popup option is enabled at the user level. Once the option is enabled, the user must run the client software. If the client software is not running, the popup cannot display, and the job remains paused in the print queue. This option is considered high impact. You are presented with two strategies that allow you to choose the implementation approach that best suits your needs.
-
Select the account implementation strategy:
-
Minimal impact (Initial single user testing)—the account popup is enabled only for a single user for testing purposes. You need to nominate the testing account; this can be an existing system/domain account used for testing purposes or your own user account. The username should be in the format used to log in to the domain/system (usually the short form).
The minimal impact strategy allows you to test the popup with the nominated test system/domain user account, after which you can enable thepopup for other users as appropriate.
-
Immediate implementation (Enable for all users)—enables the account selection popup for all users. Once the client has been deployed, the system is operational. If this option is selected, install the client software on user desktops immediately to prevent disruption of user printing services.
If in doubt, select the minimal impact strategy. This ensures the impact is isolated to only the nominated test account.
-
-
Click Next.
-
-
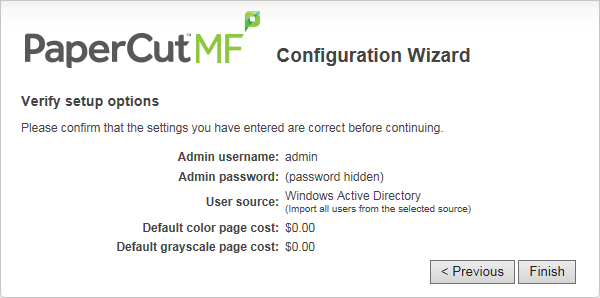
Verify setup options
The Verify setup options screen is displayed.
- Check the settings you have entered. If you want to change anything, you can return to any of the configuration screens to alter the options.
-
Click Finish.
-
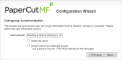
Setup complete
After completing the configuration wizard you are presented with a user synchronization status screen, showing the progress and results of the setup.
- Close the Setup Complete screen.


Click Login to access the interface and begin familiarizing yourself with the options and features available. Take some time to explore, and refer back to the relevant sections of this manual as required.
Step 5 - Printer configuration
PaperCut MF automatically detects printers. To view a list of printers:
-
Click the Printers tab.
The Printer List page is displayed.
- If the printers are not displayed, try printing a document. The first job triggers registration of the printer with PaperCut MF.
Step 6 - Sharing the User Client Software (optional)
The PaperCut MF client software install package is located in the following directory:
[app-path]/client
- Share this software over the network so workstations can access/install the client application. The directory is automatically shared in read-only form as PCClient as part of the install process.
-
Confirm that you can access the client software via the network by browsing to:
\\server\PCClient.
Step 7 - User Client software deployment (optional)
The PaperCut client software can now be deployed if required. The client software is not required for basic print tracking and reporting. Some features the client software provides include:
Displays notification messages, such as why a print job was denied.
Displays print policyPrint policies allow you to remind users via popup to print duplex, route large jobs to dedicated high-volume printers, discourage users from printing emails, discourage printing web pages in color, and print policies can be implemented in PaperCut using advanced scripting. popups, such as to encourage duplex printing.
Displays popups for shared accountA shared account is an account that is shared by multiple users. For example, in business, shared accounts can be used to track printing costs by business unit, project, or client. Organizations like legal firms, engineering firms, or accounting offices often have long lists of accounts, projects, clients, or matters. In a school or university, shared accounts can be used to track printing by departments, classes, or subjects. allocation/charging (department accounts, client billing).
Allow the user to confirm the details and/or cost of their print job before printing.
Shows the user their current balance (useful in schools where print quotas are used).
Can be used for authentication when printing from public terminals or other unauthenticated systems.
For a Professional (Client Billing) installation the client software is required so that users can allocate print jobs to client (shared) accounts via a popup. It is recommended to follow the steps in User Client Deployment for best practice client deployment methods. After the client software is deployed, you can enable the account selection popup for all users. For more information, see Enabling the Advanced Account Selection Popup For All Users.
For other installation types the client software is optional. If you choose not to deploy the client software you can still deploy it in the future.
For more details about the client software see User Client. For details about deploying the client software see User Client Deployment.
Step 8 - Testing
Following a fresh installation, it is highly recommended to test core features of the system. For further details, see Testing the installation.
What next?
Take some time to explore the features of PaperCut MF before continuing reading at Implementation by example or Tour. Business users might be interested in trying the popup client software as covered in Client software. If desired, the client software should also be deployed to other workstations. This procedure is detailed in User Client.