Configure Integrated Scanning

Step 1: Set up the scan actions
You can create any number of scan actions to meet your needs.
-
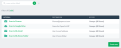
Select Devices > Scan Actions.
The Scan Actions page is displayed with a list of all available scan actions.
-
In the Actions menu, click Create new.
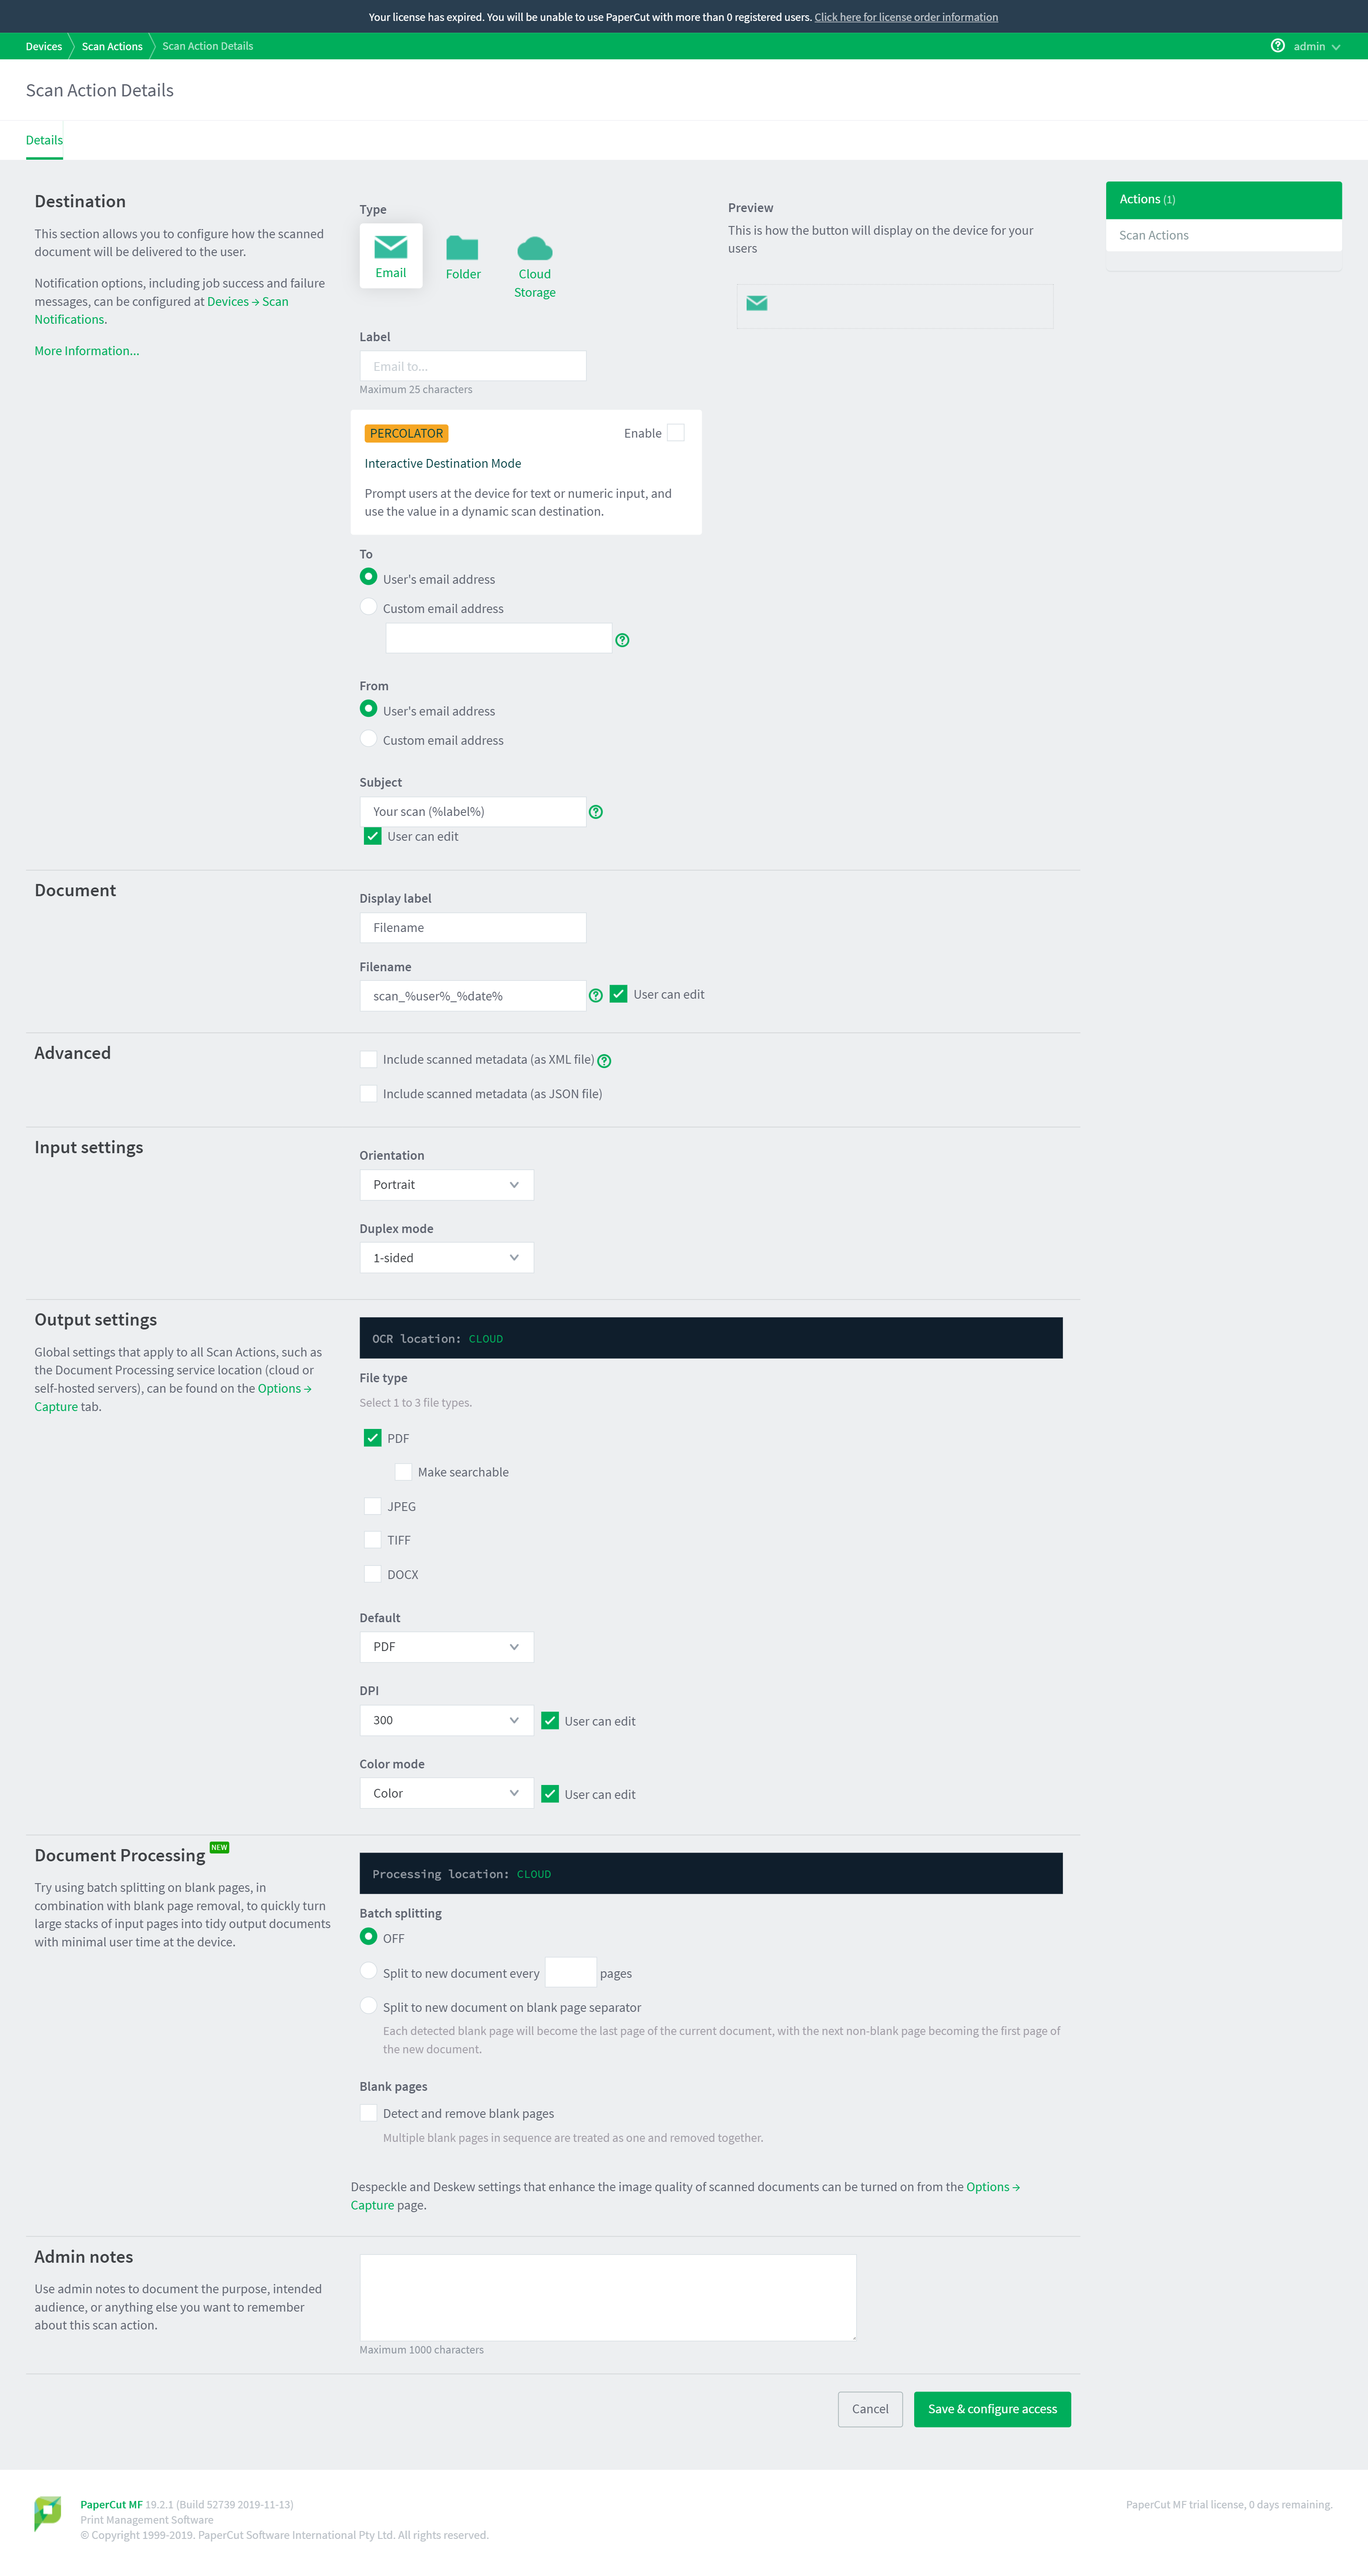
The Scan Action Details page is displayed.

-
Set the scan action destination to one of the following:
 Email
Email
-
In the Destination area, complete the following fields:
-
Type—select Email.
-
Label—enter a name for the scan action (maximum 25 characters). This label is displayed on the device to the user.
TIPMake your labels as short and intuitive as possible so that users know what the action is on the device. For example, Scan to my email or Email to Finance.
-
To—select one of the following:
-
User’s email address—the scan job is delivered to the user’s email address.
-
Custom email address—select this option, then specify the email address to which you want the scan job delivered, for example, [email protected].
NOTEEmail destinations are assigned to scan actions by the SysAdmin for security reasons. A user cannot specify an email address. This prevents unsecured scan jobs from being sent. For example, users cannot accidentally mistype an email address and send information to the wrong person
-
-
From—select one of the following:
-
User’s email address—the scan job is delivered from the user’s email address.
NOTEIf the user's email address is not recorded in PaperCut NG/MF, the system From email address is used (specified in Options > Notifications > Email Options > From Address).
-
Custom email address—select this option, then specify the email address from which you want the scan job delivered, for example, [email protected]. By default, this field is pre-populated with the system From address as specified in Options > Notifications > Email Options > From Address. This allows you to whitelist scanning emails on your mail server.
-
-
Subject—enter the default email subject. You can use substitution macros, such as %Label% in the email subject. For more information about the available macros, click More Information in the Destination area or see Substitution variables/macros.
-
User can edit—select this check box if you want to allow users to change the default email subject at the device.
-
Folder
IMPORTANTThe network folders must be accessible from the PaperCut NG/MF server. For more information, see Prepare for Integrated Scanning implementation.
-
In the Destination area, complete the following fields:
-
Type—select Folder.
-
Label—enter a name for the scan action (maximum 25 characters). This label is displayed on the device to the user.
TIPMake your labels as short and intuitive as possible so that users know what the action is on the device. For example, Scan to my Home Folder or Scan to Finance.
-
Path—select one of the following:
-
User’s home folder—the scan job is delivered to the user’s home folder.
NOTEMaximum length is 256 characters.
-
A folder path—select this option, then specify the path to which you want the scan job delivered, for example, N://finance/docs/.
NOTEMaximum length is 1000 characters.
-
-
Cloud Storage
-
In the Destination area, complete the following fields:
-
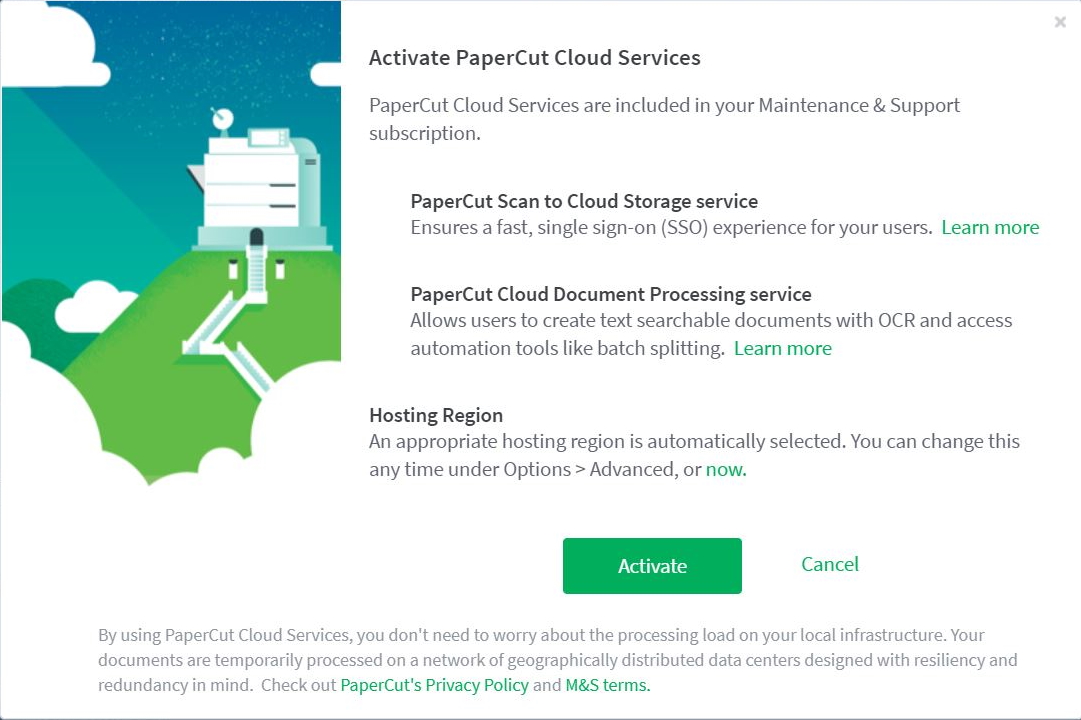
Type—select Cloud Storage.
If this is the first time you are creating a Scan to Cloud Storage scan action, a window is displayed prompting you to activate PaperCut MF Cloud Services.

-
If you want to manually select the hosting region for PaperCut Cloud Services:
-
Select a local region to minimize the transit of your documents outside your country during processing.
-
Make sure your selection adheres to your organization's privacy policy and regulations.
-
-
Click Activate.
PaperCut MF checks that you have active Maintenance & Support (M&A)—a requirement for creating Scan to Cloud Storage actions.
-
-
Cloud storage provider—select the cloud storage provider.
NOTEYou can see the folder to which the scan files are sent in the Admin interface on the Devices > Scan Actions page.
-
Label—type a name for the scan action (maximum 25 characters). This label is displayed on the device to the user.
TIPMake your label as short and intuitive as possible so that users know what the action is on the device. For example, Scan to OneDrive or Scan to Dropbox.
-
SharePointDocument Library URL—(SharePoint Online only) type the URL of the document library in which you want the scan jobs delivered. When using sub-sites, you need to specify the hierarchy, for example:
https://companyname.sharepoint.com/sites/melbourne/Invoices/AllItems.aspx
Your URL might look more complex than this example, but PaperCut NG/MF will work out the correct path if you copy the entire URL.
NOTE-
Maximum length is 1000 characters.
-
If you want to scan to more than one document library, just set up multiple Scan Actions that each point to a different document library, such as one for invoices and another for forms.
-
-
IMPORTANTWhen a user leaves your organization and their PaperCut MF account is deleted, they will lose access to this functionality. You should, however, recommend that they remove the PaperCut MF app from their cloud storage account.
-
-
Complete the fields in the Document area:
Display label
The label for the filename field on the device. If you change the default value of Filename, the label in the next field is also changed. You can change the label to provide more specific guidance to the user about the format of the filename. For example, if you have a scan action to send invoices to a cloud drive and you want the scanned invoice file to be named according to the invoice number, you could change the label to Invoice No..
Filename
The default value for the filename. You can use macros, such as %Label% in the filename. For more information about the available macros, click More Information in the Document area or see Substitution variables/macros.
User can edit
Select this checkbox if you want to allow users to change the default filename at the device.
Advanced—Include scan metadata file. For scan to email or folder only.
Select one of these checkboxes if you want to generate an XML or JSON metadata file. For example, you might want to upload the scanned documents to a Content Management System.
The scan metadata file includes the:
-
shared and personal account name
-
local date and time of the scan
-
device used for the scan
-
email address to which the file was sent
-
filename
-
scan job id
-
username
For more information, see Scan metadata file.
-
-
Complete the fields in the Input settings, Output settings, and Document Processing areas:
Orientation
Select Portrait or Landscape.
Duplex mode
Select 1-sided or 2-sided.
Paper size
Select the default paper size that is highlighted on the device’s Scan Settings screen’s Paper Size field:
-
For ISO standard - A3, A4, A5, Auto (Same size), Auto (Mixed sizes)
Default: A4
-
For North American standard - Letter, Legal, Ledger, Auto (Same size), Auto (Mixed sizes)
Default: Letter
Note:
-
Customizing a device’s config keyA config key stores information about a specific advanced setting in PaperCut. Config keys are editable by an administrator in the Config Editor. ext-device.scan.default-paper-size, overrides these paper size defaults for the corresponding device.
-
The Auto options are only available on some devices. On these devices:
-
Auto (Same size) - maps as Same on the device, and applies the first page’s paper size to all other pages
-
Auto (Mixed sizes) - maps as Mixed on the device, and retains each page’s original paper size.
-
File type
Select up to three of the output file types to make them available to users at the MFD: PDF, JPEG, TIFF, or DOCX).
-
If you select PDF, you can also select Make Searchable to make the output a searchable PDF file using OCR.
-
If you select only one file type, that is the only one users will see at the MFD. You cannot select more than three file types due to limitations in the display panel size of some MFDs.
Default file type
Select the default type of file that will be created if a user does not select a file type at the MFD (PDF, TIFF, or JPEG). If you have selected only one file type, you do not need to select a default.
DPI
Select the resolution of the scan (100, 200, 300, 400 or 600 DPI).
NOTEIf you have selected an OCR enabled file type (that is, PDF > Make Searchable or DOCX), we recommend setting the DPI to 300 or greater. However, remember that the higher the resolution, the longer a scan job will take to be processed.
Color mode
Select whether you want scans to be Color, Grayscale or B&W (black and white) or Auto.
Note: Auto is only available on some devices.
Remove Blank Pages
-
Enabling this option will automatically detect and remove blank pages before delivering the scanned document.
-
By default, Remove Blank Pages is OFF
-
Blank page detection sensitivity can be fine-tuned using system.scan.docproc.blank-threshold from the Config Editor page.
Batch Splitting
-
Enabling this option will separate a single input document into multiple scanned output documents.
-
By default, Batch Splitting is OFF
-
Select the batch splitting method (New document every N pages, or Split on blank page separator)
-
The output documents from a Batch Split scan job all share the same job settings, and are sequentially named EG) Filename_1, Filename_2, Filename_3, etc
User can edit
Select one or both of these checkboxes if you want to allow users to change the DPI and/or Color mode from the default value at the device.
NOTESome devices do not support all available settings. In these cases the default settings might be different to those you select.
-
-
If you want to include any notes about the scan action, enter them in the Admin Notes area. For example, if you have specified an email address, you might want to explain who the email is being sent to.
-
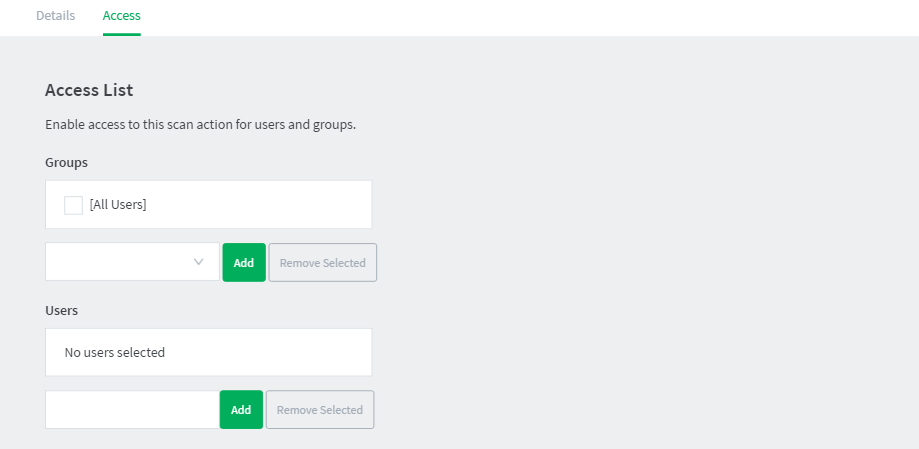
Click Save & configure access.
The Access List page is displayed. This page allows you to set the scanning permissions.

-
Select the groups and users to whom you want to make this scan action available:
-
Select the group or user from the list
-
Click Add.
The user or group is added to the Access Control List (ACL).
For more information about setting up groups, see Groups in PaperCut NG/MF.
-

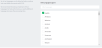
Step 2: Configure the capture settings
-
Click Options > Capture. The Capture screen is displayed.

In the HostingOCR section, select where you want to host Document Processing activity:
Use PaperCut Cloud Services for Document Processing
Use PaperCut's Cloud Document Processing service to handle Document Processing. This is the default hosting option.
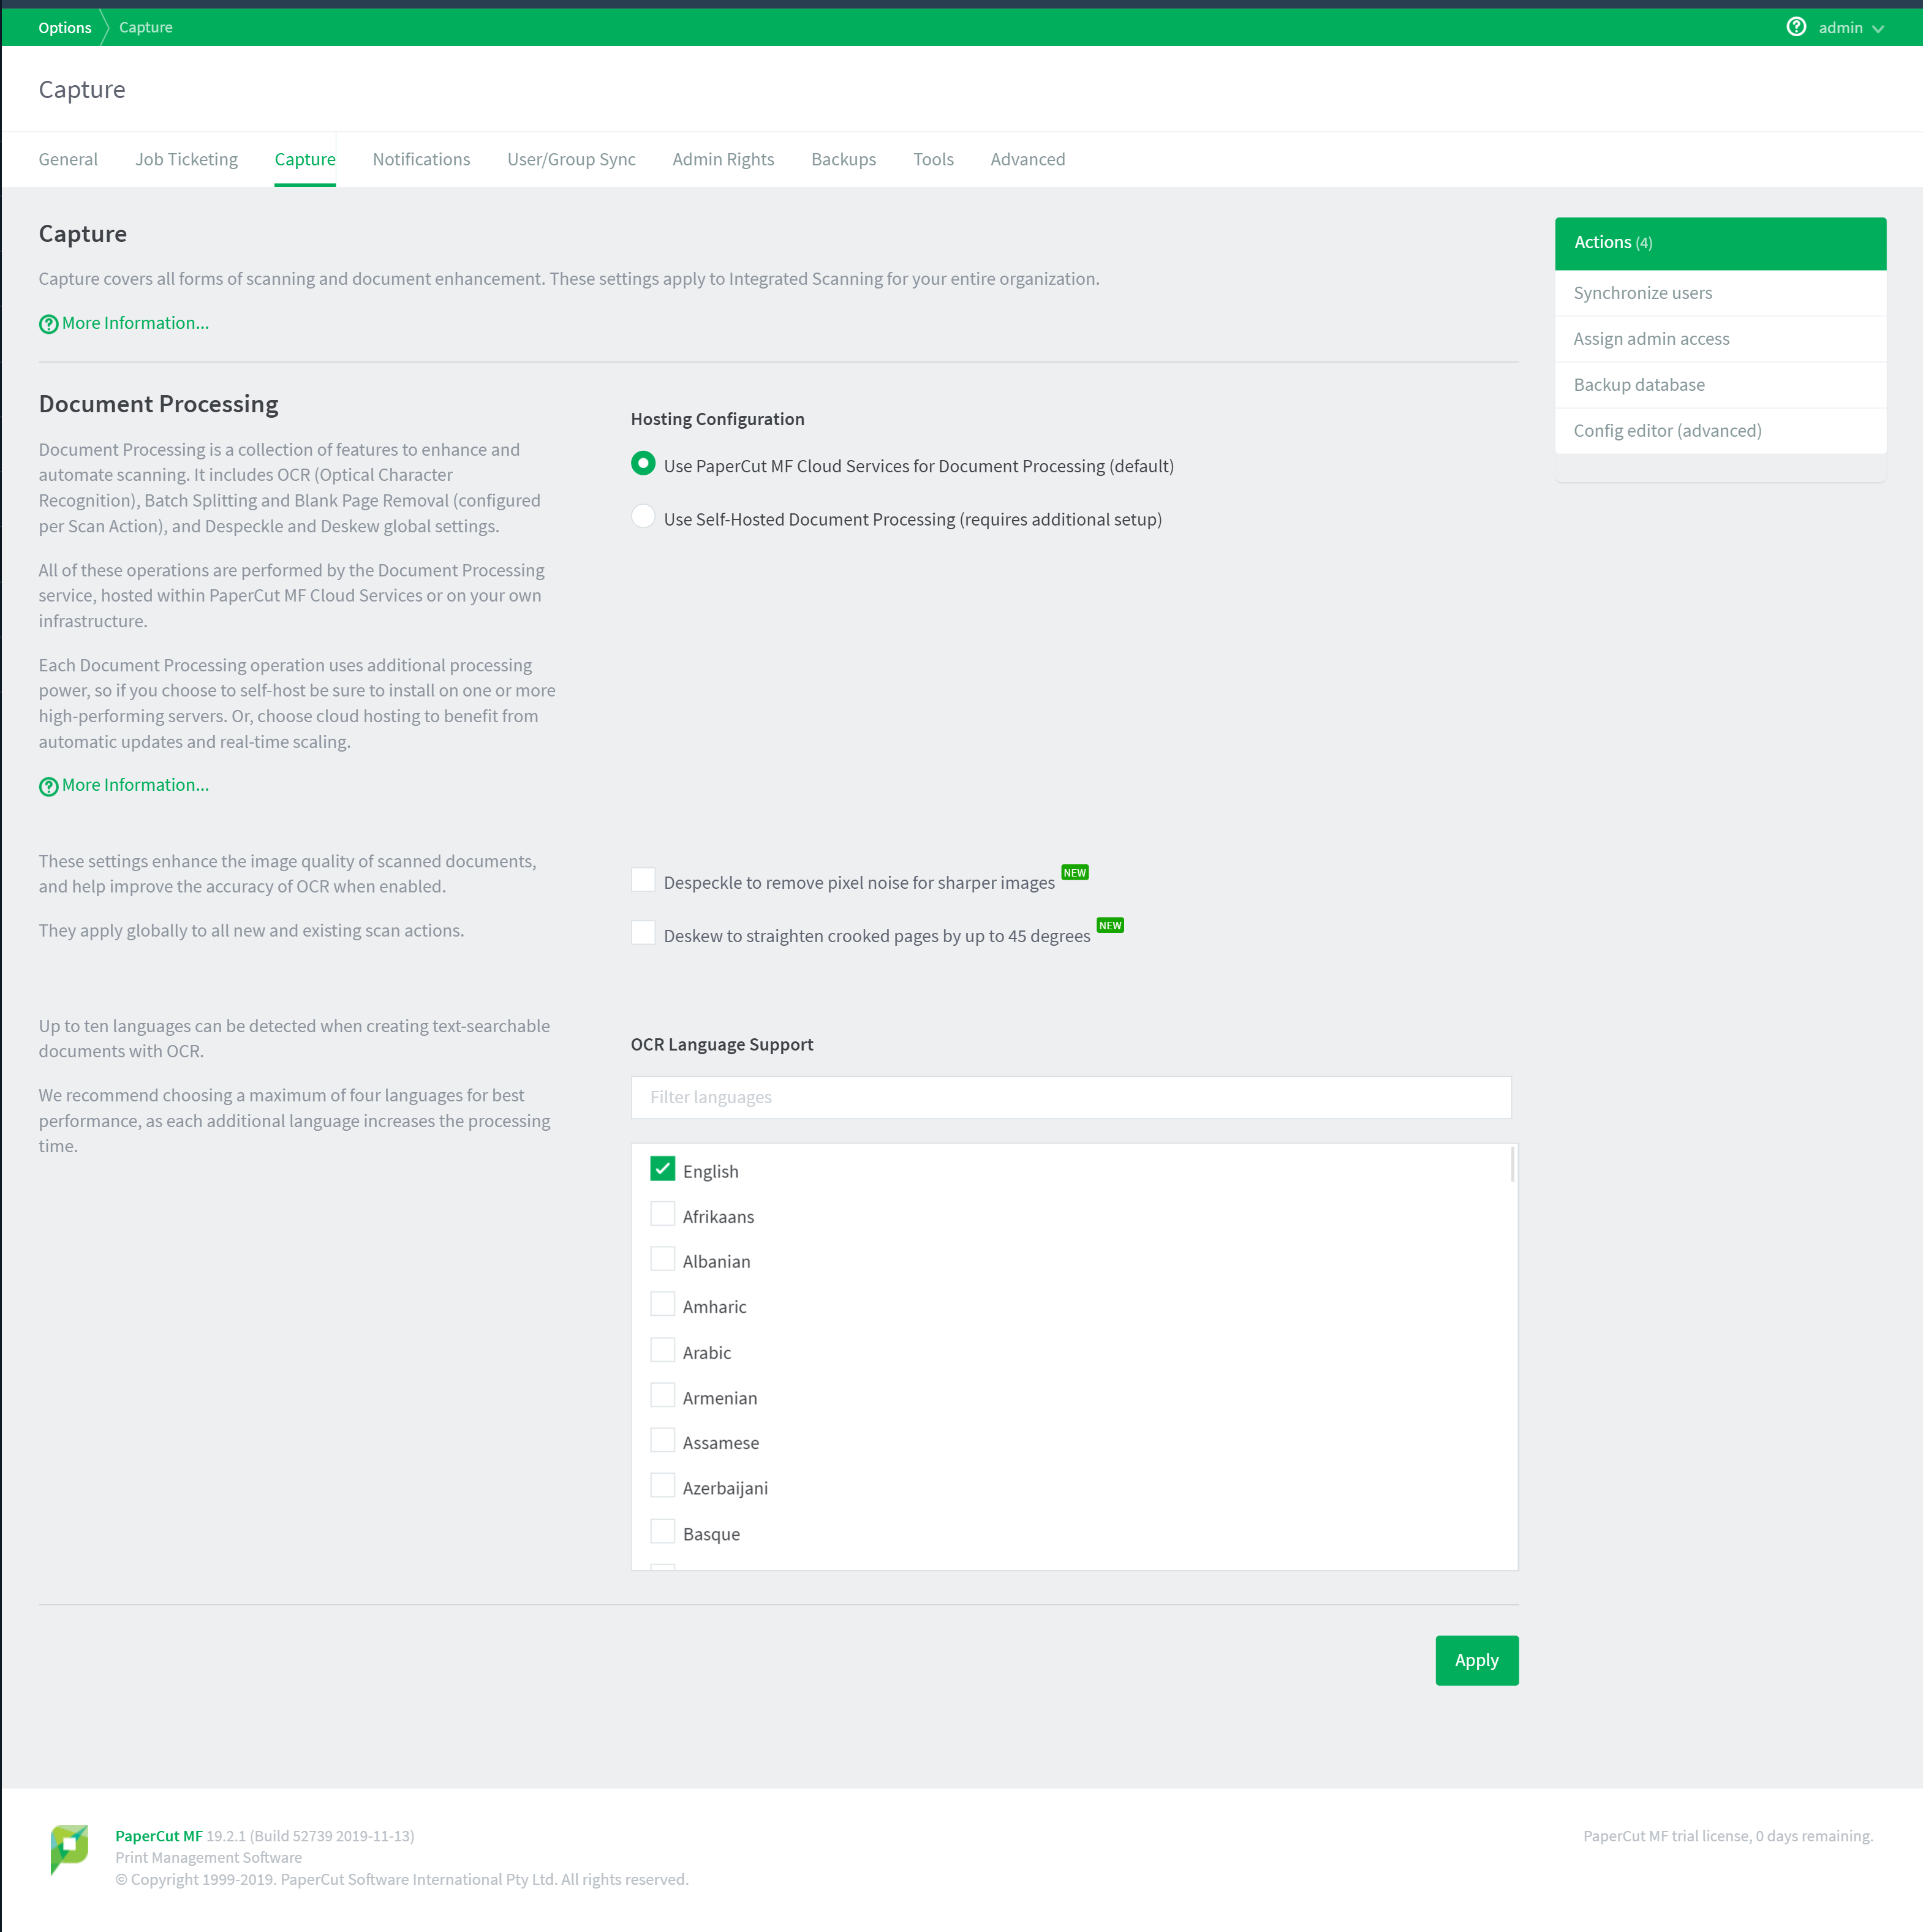
Use locally hosted Document Processing
Use your organization's servers to handle Document Processing. This requires the On-Prem OCR & Document Processing Pack be added to your licence.

-
Click Download Now. The Document Processing installer is downloaded, ready for you to install on the server(s) of your choice.
NOTEIdeally, to ensure optimum Application ServerAn Application Server is the primary server program responsible for providing the PaperCut user interface, storing data, and providing services to users. PaperCut uses the Application Server to manage user and account information, manage printers, calculate print costs, provide a web browser interface to administrators and end users, and much more. performance, set up a dedicated server for Document Processing.
-
Install Document Processing; then return here and continue with these instructions.
-
In Hostname, type the hostname or IP address of the server where you installed Document Processing. If you installed it on multiple servers, add each one here individually.
-
-
In the Document Processing section, you can configure the optional Despeckle and Deskew settings. These settings apply to all new and existing scan actions:
Despeckle
When Despeckle is active, background pixel noise is automatically removed from scanned pages
Deskew
When Deskew is active, pages that are crooked by up to 45 degrees are straightened.
NOTEEach of these settings consumes additional processing power, so we recommend you use them only when scan quality is a higher priority than speed of delivery.
Ideally, to ensure optimum Application Server performance, set up a dedicated server for Document Processing.
-
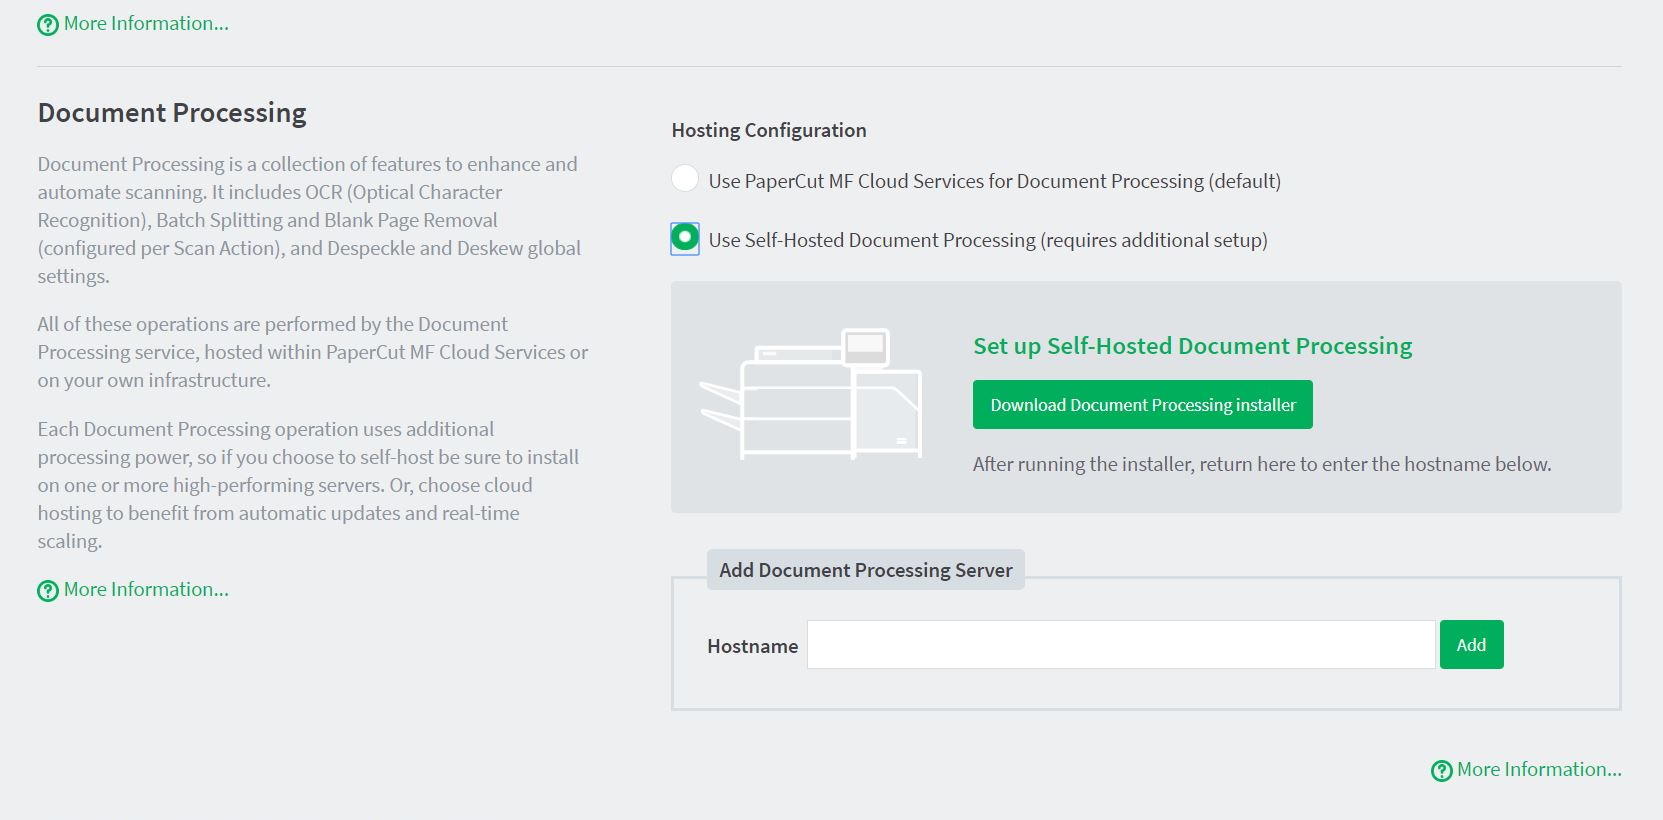
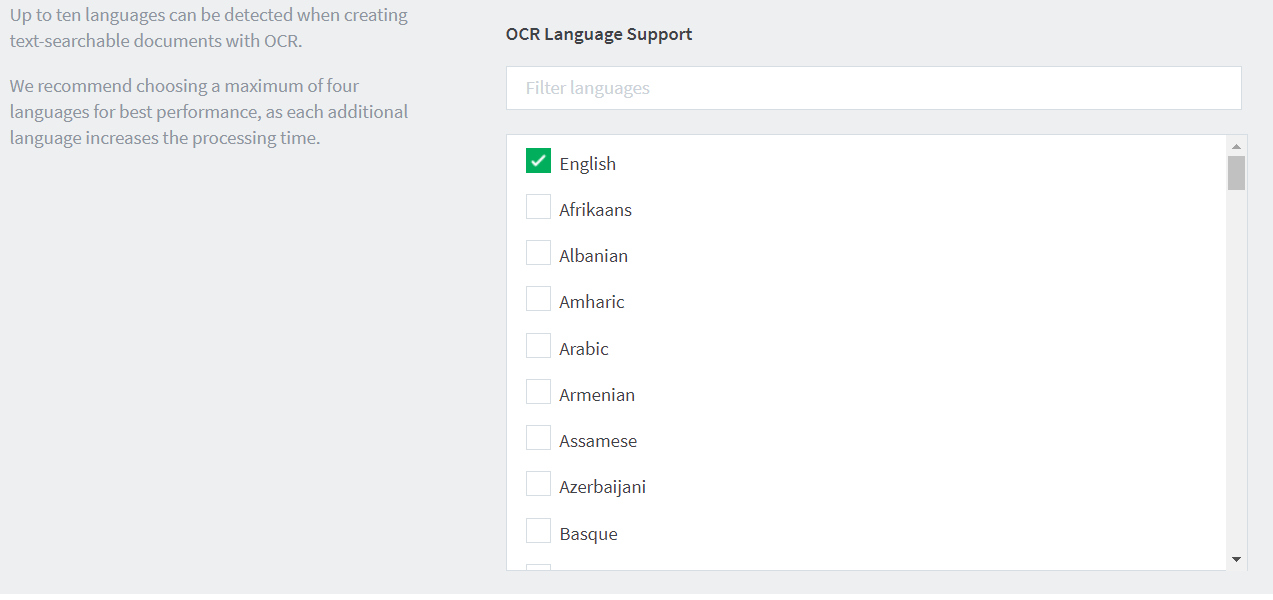
Select up to 10 languages you want OCR to detect and process in your scans.
 NOTE
NOTEAlthough you can select up to 10 languages, the more you select the poorer the overall scannis ing performance. Up to four languages is a good number for most environments.
-
Click Apply.
Step 3: Enable Integrated Scanning for a device
For each scanning device, you must enable Integrated Scanning.
Ensure your Multifunction Device is configured for Integrated Scanning. For more information, see the embedded guide for the device.
-
In the Admin web interface, click the Devices tab.
The External Device List page is displayed.
-
Select a device.
The Device Details page is displayed.
-
In the Integrated Scanning area, select the Enable Integrated Scanning check box.
NOTEThis option is not available if your device does not support Integrated Scanning.
-
Click OK.
Integrated Scanning jobs are included in the existing PaperCut MF reports when you track and control scanning, and are reported on in the same way as native scanning jobs. For more information, see Reports.