Customize the User web interface
The User web interfaceThe User web interface provide a range of services for users, including a summary of usage and balance history, a list of the shared accounts that the user can use for printing, the current costs for printing usage, ability to add balance by using a TopUp/Pre-Paid Card or an external payment system (when using the payment gateway module), transfer funds to other users, view a history of balance transactions, view a list of the user's recent printing, and view print jobs pending release (when using a Release Station). displays information about the user's account and provides access to features such as TopUp/Pre-Paid Cards. You can tailor the visual design of these pages to make them fit into the look and feel of your internet or intranet site.
Change the branding of the User web interface
-
Click the Options tab. The General page is displayed.
-
Scroll to Branding > User web interface section.

-
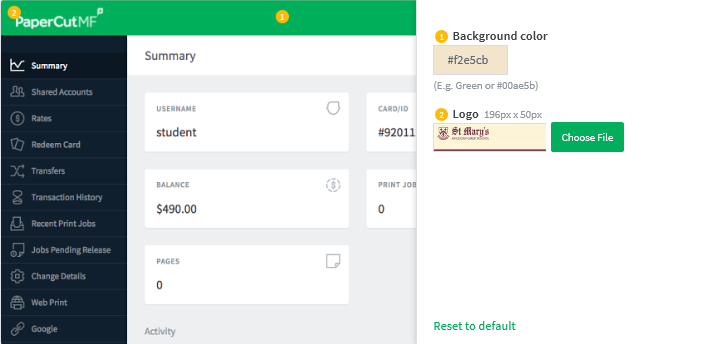
To change the header's background color:
-
In Background color, enter the name of the required color or its hexadecimal value #RRGGBB. e.g. green or #00ae5b.
-
-
To change the header logo:
-
Click Choose File next to Logo; then locate the header logo image file. The image must be in PNG format and for best results should be sized 196px x 50px.
-
-
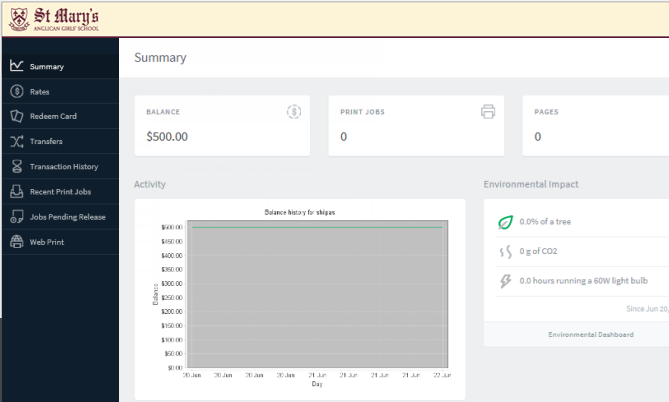
Click Apply.
The changes are reflected on the User web interface.
To undo the changes made and restore the default PaperCut NG/MF styling, click the [Reset to default] link.
Customize the CSS of the User web interface
The design of the User web interface is controlled via HTML "include" files for the header and footer areas of the page, with page styling controlled via Cascading Style Sheets (CSS). Placing the following files in the PaperCut NG/MF directory structure at [app-path]/server/custom/web supersedes User web interface customizations in the Options > General > Branding section of the Admin web interface.
| Filename | Description |
|---|---|
| user3.css |
If this file exists, the contents of user3.css is included as an overriding stylesheet. Use the styles in this file to define fonts, colors and sizes. NOTE
The number in this file has been incremented from versions prior to 17.2. |
| header3.inc |
If the header include file exists, the HTML in the header area of the pages is replaced with the contents of the file. Save this file in UTF-8 encoding for international characters to be displayed correctly. NOTE
The number in this file has been incremented from versions prior to 17.2. |
| footer3.inc |
If the footer include file exists, the HTML in the footer area of the page is replaced with the contents of the file. Save this file in UTF-8 encoding for international characters to be displayed correctly. NOTE
The number in this file has been incremented from versions prior to 17.2. |
Any custom content placed in [app-path]/server/custom/web/, such as additional images, can be accessed via a URL beginning with /custom/. For example, if a file named header.jpeg is placed in [app-path]/server/custom/web/, you can access it via the URL /custom/header.jpeg.
To save a file in UTF-8 encoding on Windows using Notepad, change the Encoding option to UTF-8 on the > Save As dialog.
Additional links in the navigation menu
The navigation menu in the user web interface contains links for the PaperCut services that are enabled and available to the user. In some cases, you might want to add additional external links to this menu. Examples include:
-
Linking to a print policyPrint policies allow you to remind users via popup to print duplex, route large jobs to dedicated high-volume printers, discourage users from printing emails, discourage printing web pages in color, and print policies can be implemented in PaperCut using advanced scripting. page on the organization's intranet.
-
Linking to a page with key contact details.
-
A link to return to the "main" intranet page/portal.
Custom links are displayed above the Log Out item.
Add a custom link
-
Click the Options tab. The General page is displayed.
-
In the User Features area, select the Add custom links to the user web navigation menu check box.
-
Click Add link.
-
Complete the following fields:
-
Label/Text—the text that is displayed in the navigation menu.
-
URL—the destination of the URL when clicked.
-
Target—the destination where the linked URL will be displayed. For more information about target values, visit w3schools targets page.

The link is now displayed in the User interface.

-


Existing custom links are displayed in the Admin web interface under the Add custom links to the user web navigation menu check box. To delete a link, click the [delete] link next to the relevant link.

The URL in custom navigation links can also contain special replacement fields. E.g. the %user% in http://example.edu/print-policy?u=%user% is replaced with the logged in username to create a URL such as http://example.edu/print-policy?u=tom.
The available special replacement fields are as follows:
| Field | Description |
|---|---|
| %user% | The username of the logged in user. |
| %user_full_name% | The full name of the logged in user. |
| %user_id% | The id/card number of the logged in user. |
| %user_email% | The email address of the logged in user. |
| %user_office% | The office of the logged in user. |
| %user_department% | The department of the logged in user. |
| %return_url% | A URL that sends the user back to the user web interface. The user is sent back to the Summary page as if they had just logged in, assuming their session has not timed out. |
Custom printer maps for Web Print
You can use a graphical map or other custom content instead of the default printer selection list in the Web PrintWeb Print enables printing from user-owned devices without the need to install printer drivers and manage server authentication. wizard. For more information see Designing Printer Maps / Custom Printer Selection Lists.