Customize the Admin web interface
You can tailor the visual design of the Admin web interface to make it fit in with the branding of your internet or intranet site.
-
Click the Options tab. The General page is displayed.
-
Scroll to the Branding > Admin web interface section.

-
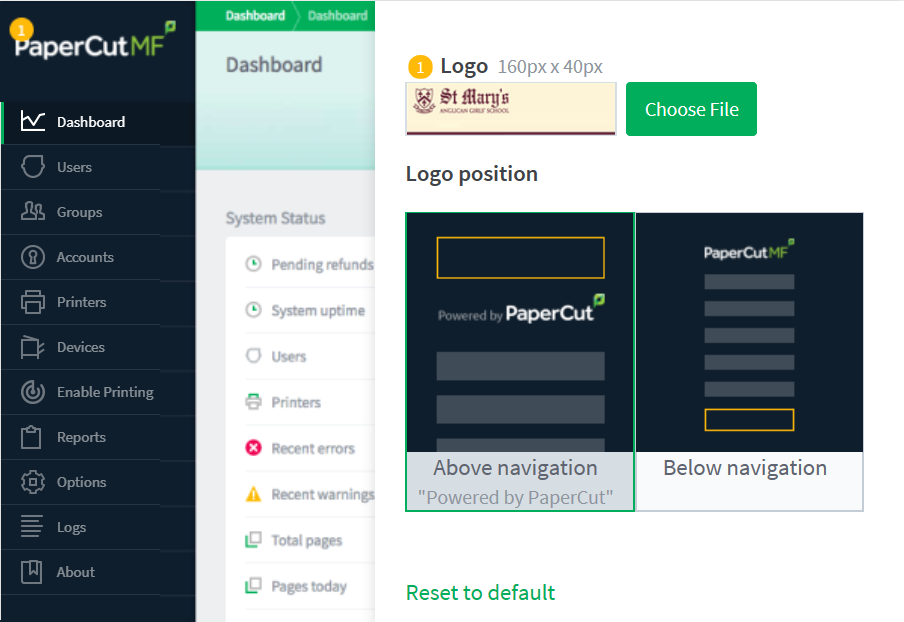
To change the left hand menu's logo:
-
In Logo, click Choose File.
-
Locate the logo image file. The image must be in PNG format and for best results should be sized 320px x 80px.
TIPLogos sit on a dark background so you should use a white variation of your logo.
 in the administration interface")
-
-
To change the Logo position of the logo on the left hand menu, select Above navigation or Below navigation.
-
Click Apply.
The changes are reflected on the Admin web interface.
![]()
![]()
To undo the changes made and restore the default PaperCut NG/MF styling, click the [Reset to default] link.
You can add your own content to the dashboard to display a short message for the attention of other administrators. Other examples might include:
-
Guidelines for administering printers
-
Policies for handing refunds
-
Contact details for key people
-
Or even your own widget that loads content from elsewhere

| Config name | Description |
|---|---|
| dashboard-notice.inc |
HTML contained within this file is displayed on the administration dashboard page. Place it in [app-path]/server/custom/web/. |
| dashboard.gadget.custom.title | Change the title of the custom dashboard widget. For information about setting config keys, see Using the Advanced Config Editor. |